Have you had dry, bland ribs? I’ve been there, and that’s exactly why I created this recipe. I grew up watching my great-grandmother work magic in the kitchen, especially when it came to ribs. This oven-baked version stays true to those Southern roots from Louisiana and Mississippi—slow-cooked, perfectly seasoned, and fall-off-the-bone tender. If you’ve ever been let down by bland or dry ribs, this recipe is here to set things right with deep flavor and dependable results.
I grew up around ribs that were slow-cooked with love and seasoned to the bone, and that’s exactly what you’re getting with this recipe. These oven roasted baby back ribs bring that same BBQ comfort without needing a grill or smoker. I’ve tested this method until it gave me that fall-off-the-bone texture every single time, and of course, they’re seasoned with real flavor that hits.
Baked Baby Back Ribs Ingredients
- Rack of Ribs
- Brown Sugar or Sweetener
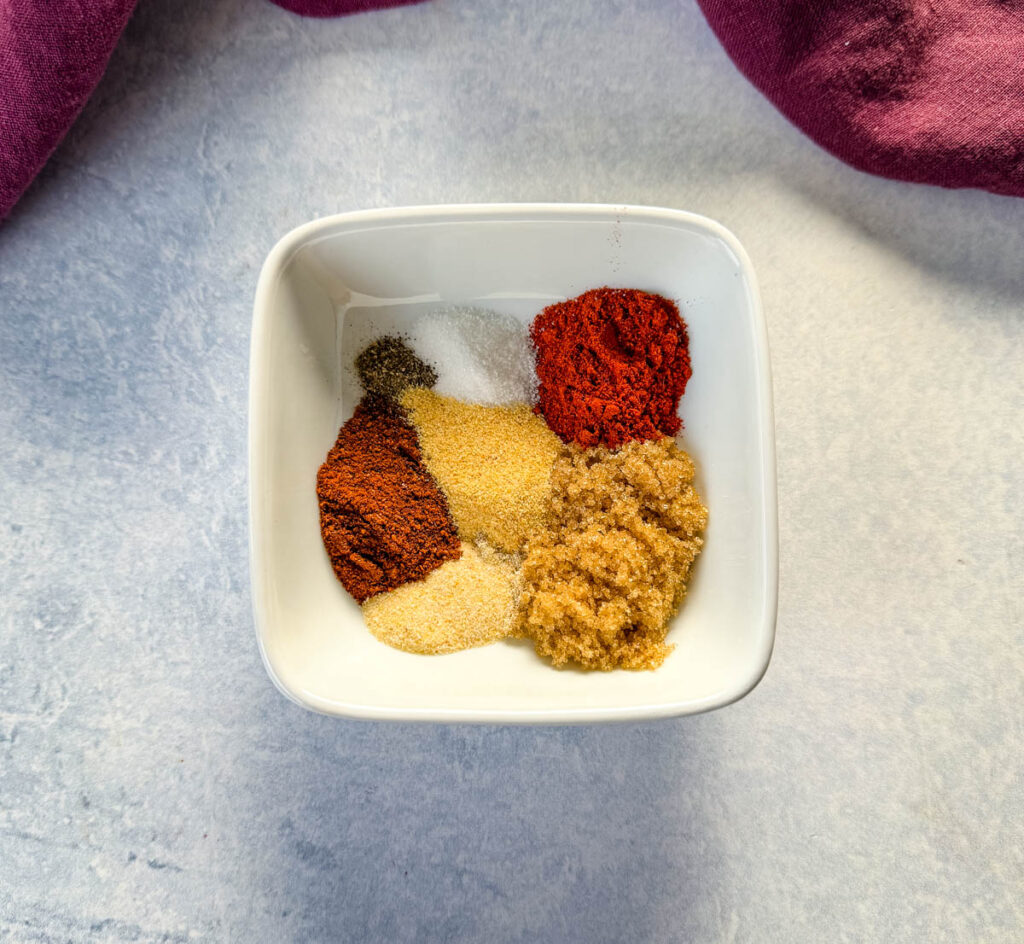
- BBQ or Pork Rub (or a combo of these spices: chili powder, smoked paprika, garlic powder, onion powder, salt, and pepper)
- BBQ Sauce
- Foil
How to Make Baby Back Ribs in the Oven
Detailed measurements and full instructions can be found in the recipe card at the bottom of this post.
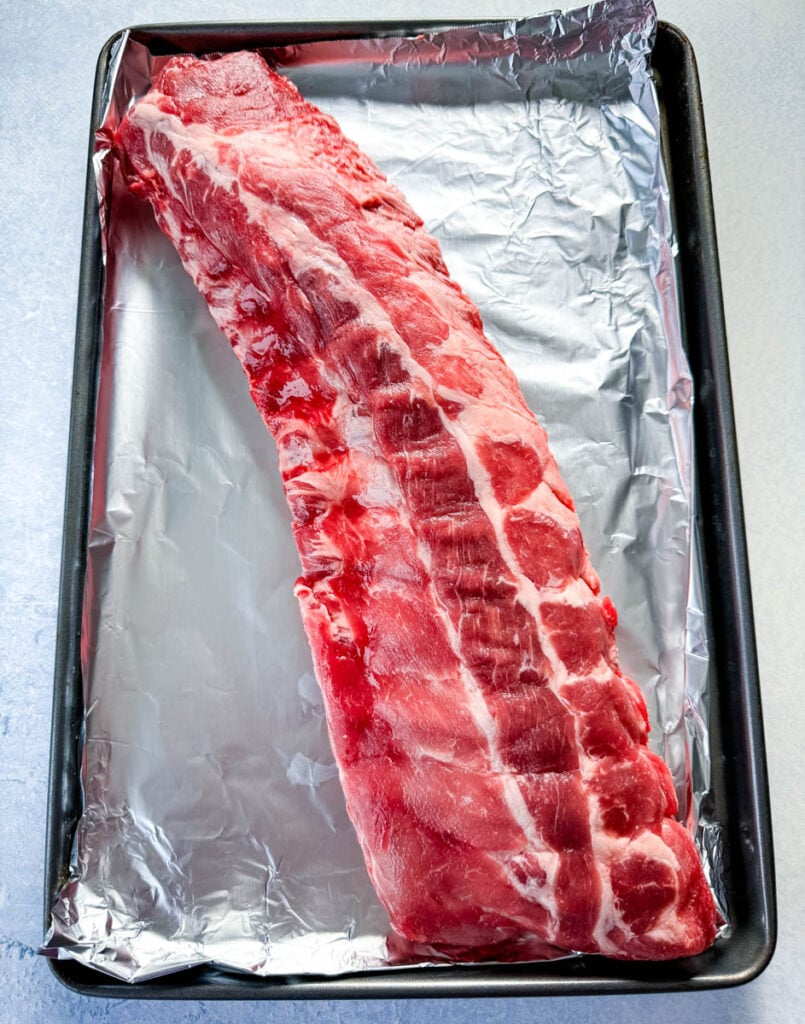
- Prep the ribs: Remove the membrane from the back of the ribs if it’s still there, this helps them get more tender. Pat the rack dry with paper towels.
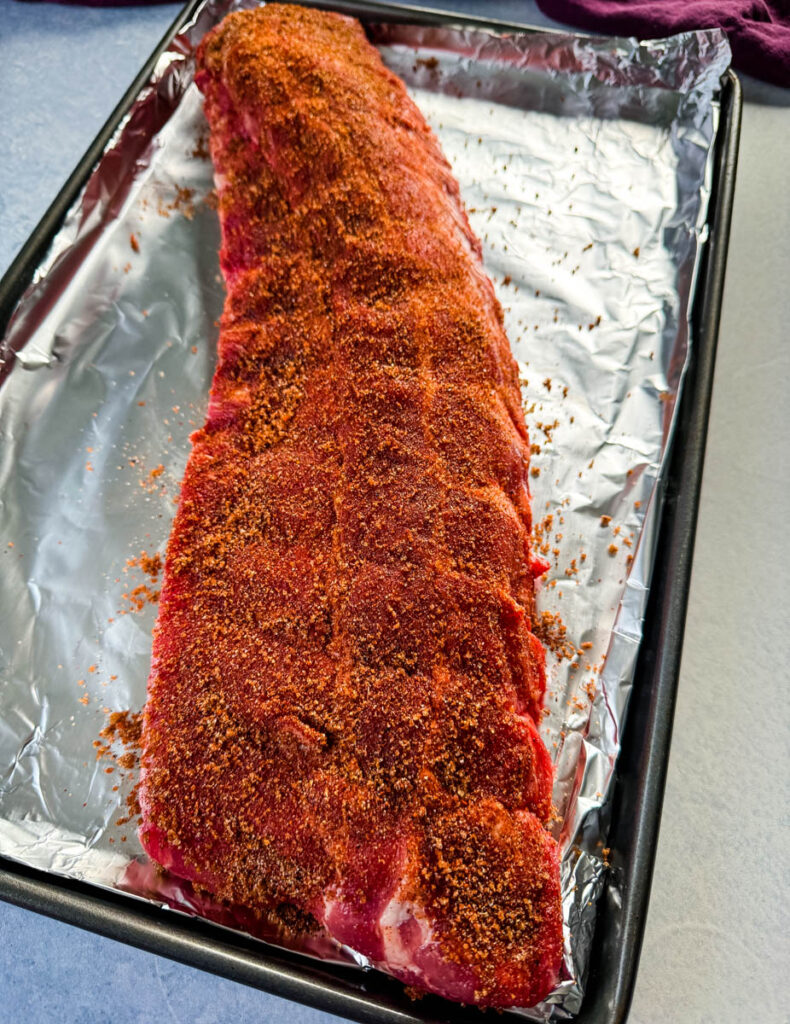
- Season generously: Place the ribs on a large sheet of foil. Sprinkle brown sugar or your preferred sweetener all over both sides. Follow with your BBQ or pork rub. If you’re mixing your own, combine chili powder, smoked paprika, garlic powder, onion powder, salt, and pepper. Press the seasoning into the meat so it really sticks.
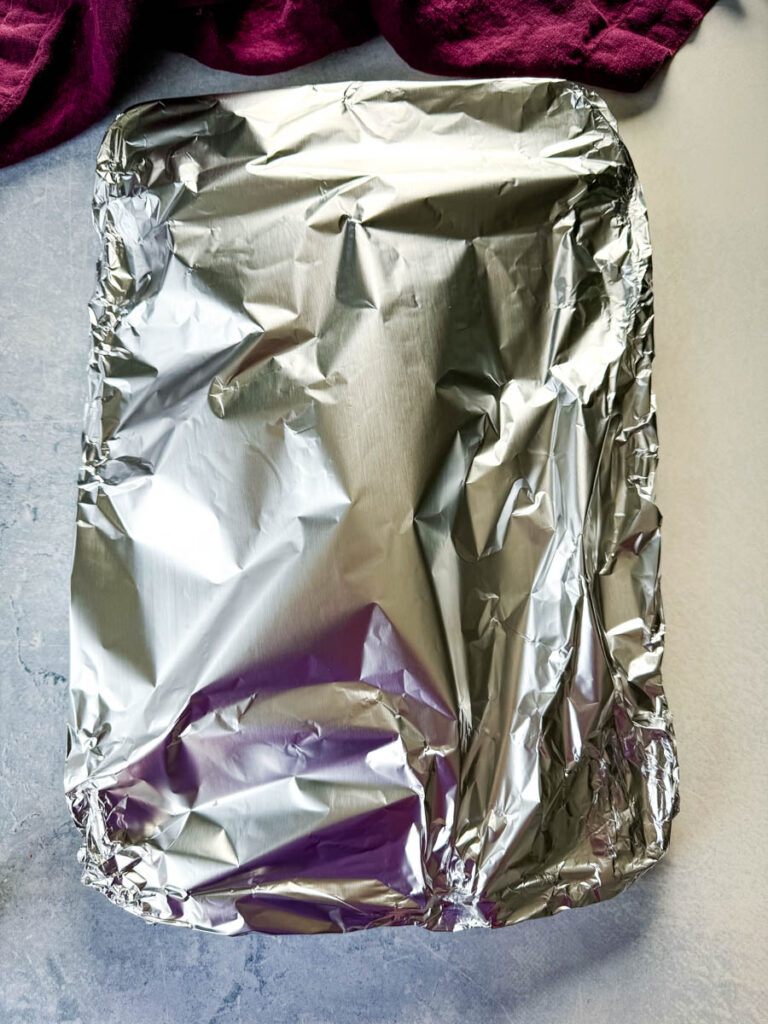
- Wrap them tight: Wrap the ribs tightly in foil, sealing all the edges so no steam escapes. You want them fully enclosed so they cook low and slow in their own juices.
- Bake low and slow: Place the foil-wrapped ribs on a baking sheet and bake until the meat is tender and starting to pull back from the bones.
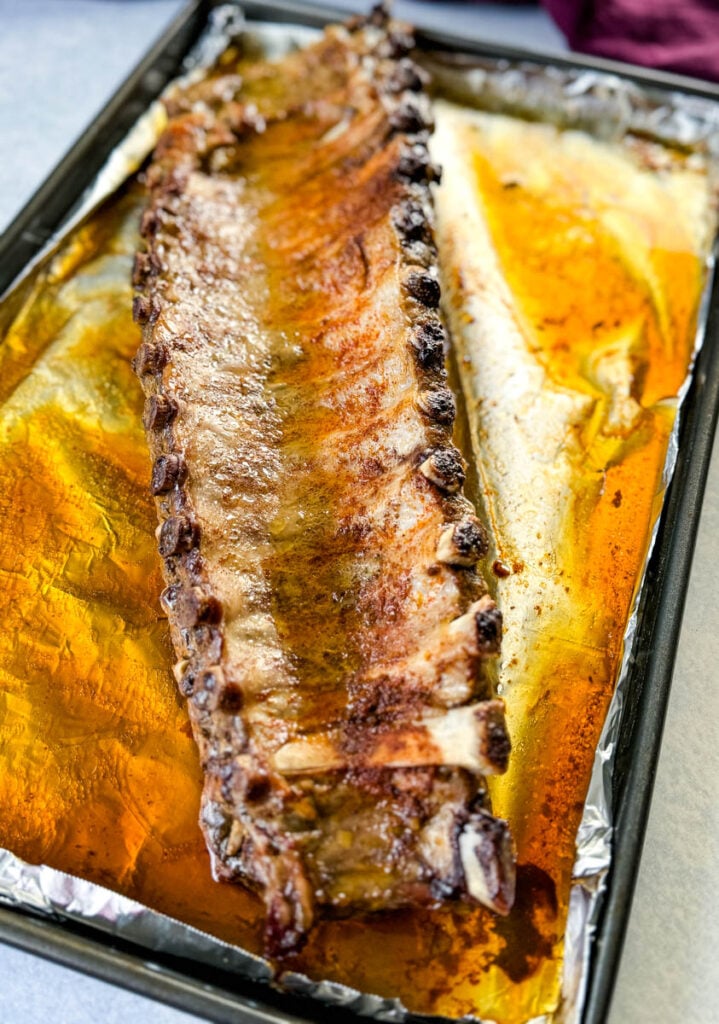
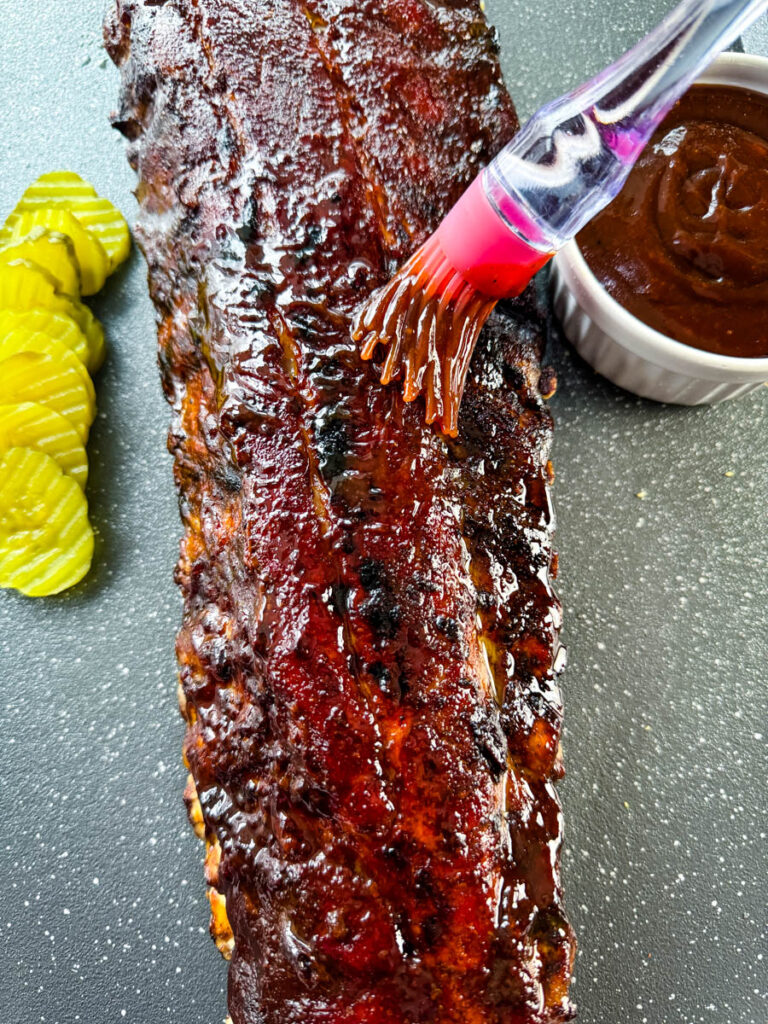
- Sauce and finish: Carefully open the foil and transfer the ribs to a baking sheet lined with fresh foil if needed. Brush a generous layer of BBQ sauce over the top.
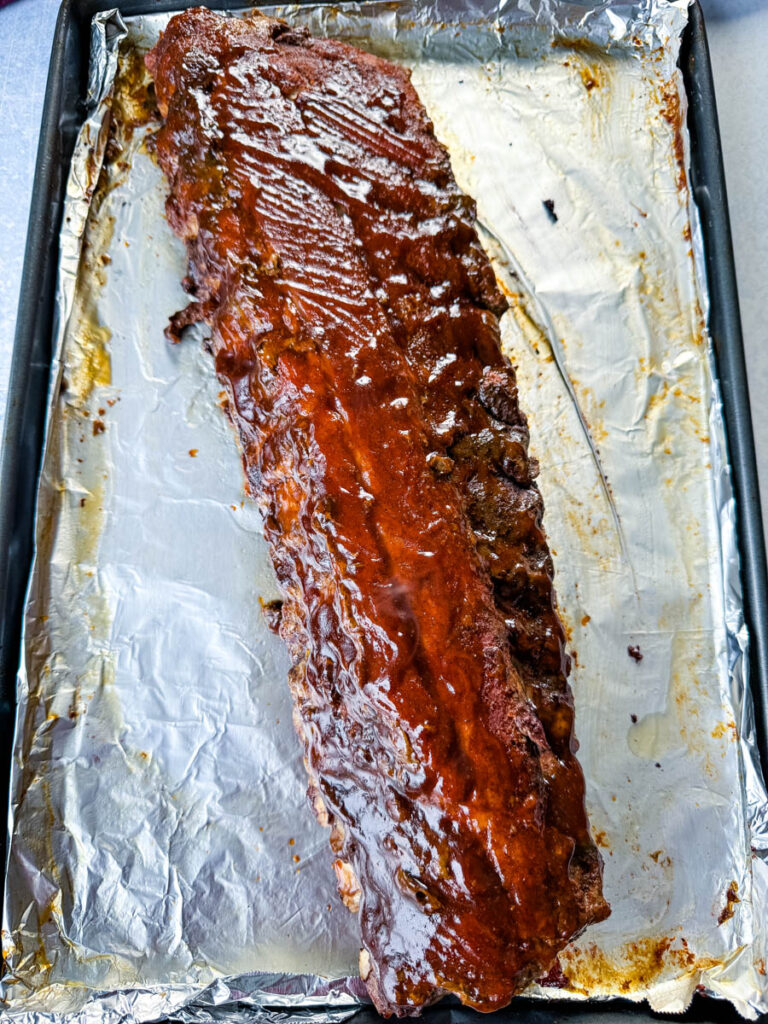
- Caramelize the sauce: Increase the oven temperature and return the ribs to the oven, uncovered, and bake for 4-5 minutes until the sauce thickens and gets sticky.
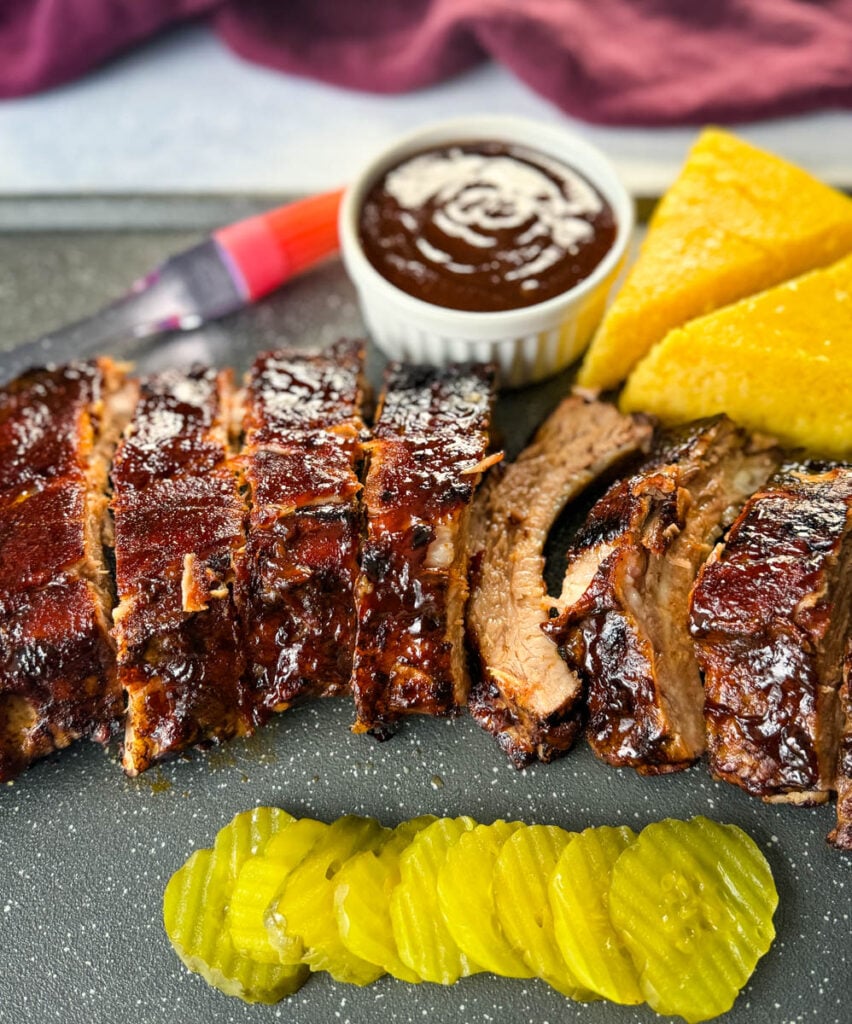
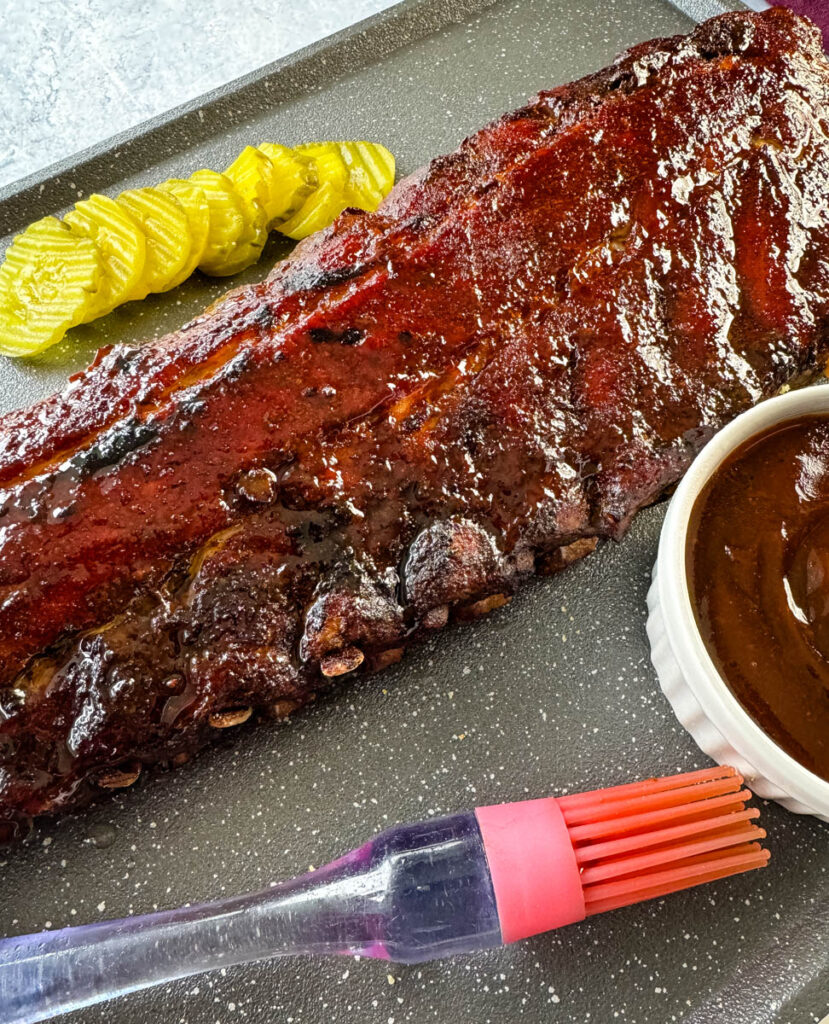
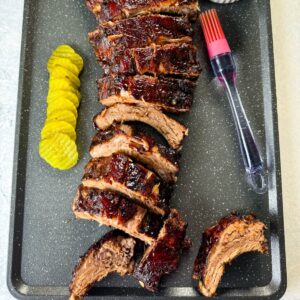
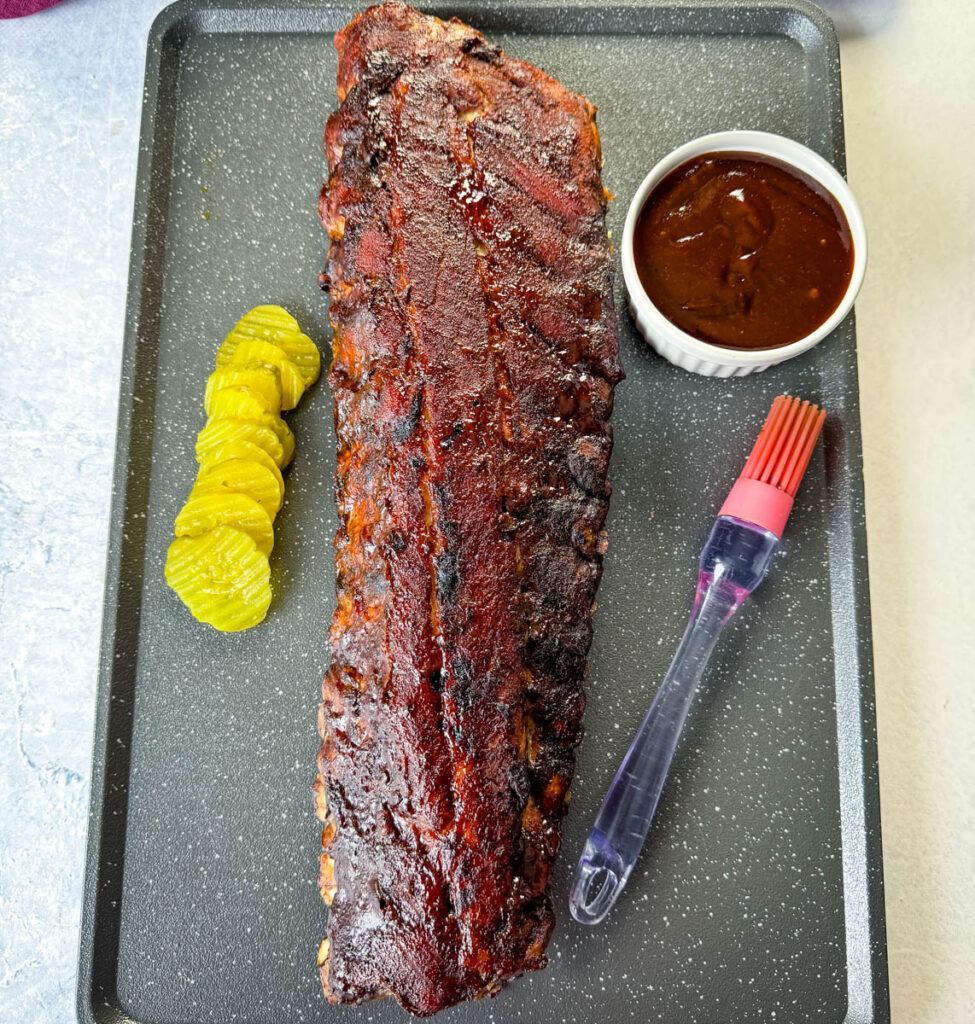
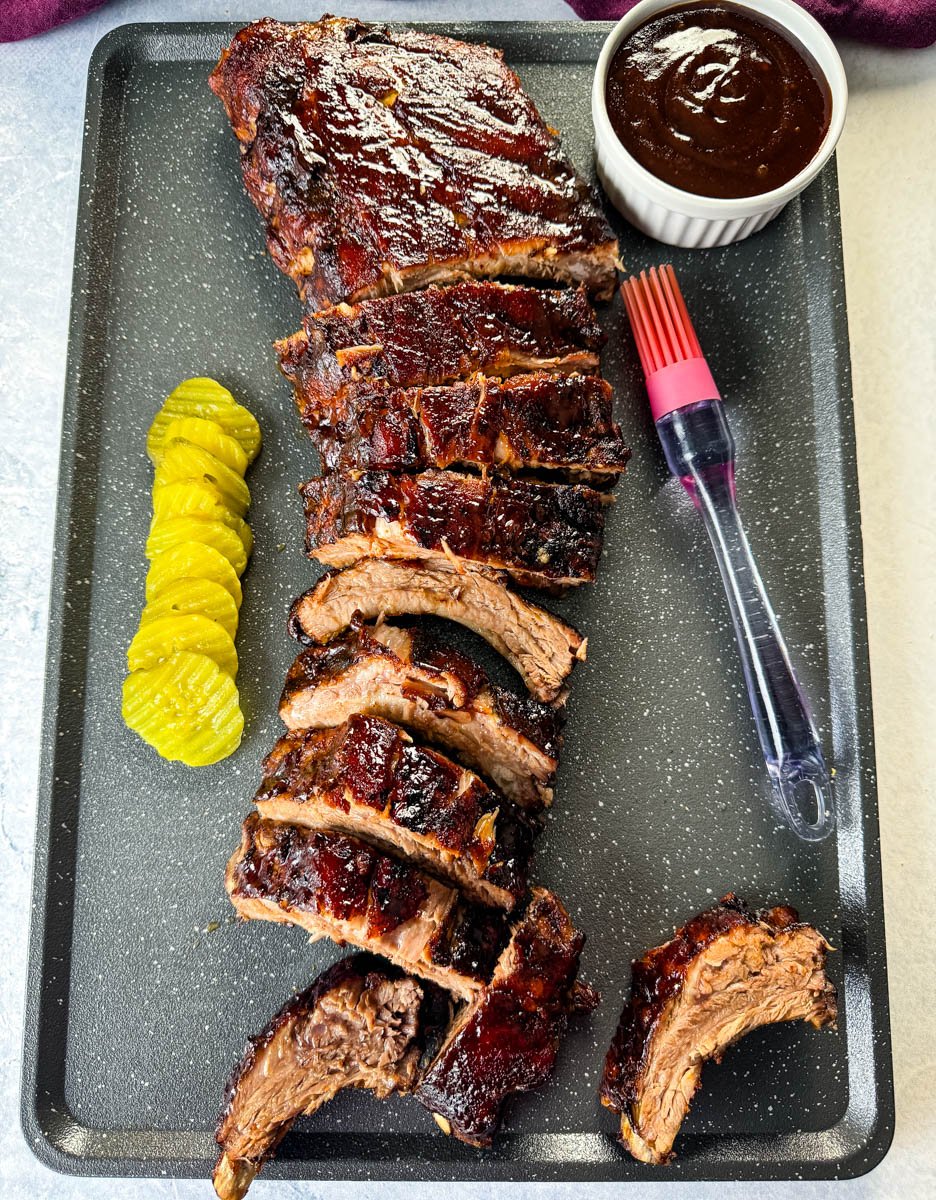
- Rest and slice: Let the ribs rest for 15-20 minutes before slicing between the bones. Serve warm with extra BBQ sauce if you like it saucy.
Want to save this recipe for later?
Oven Roasted Baby Back Ribs
Want to save this recipe for later?
Ingredients
- 1 rack ribs I used 3 ½ pounds baby back ribs
- 2 teaspoons brown sugar or sweetener
- 1 teaspoon chili powder
- 1 teaspoon smoked paprika Regular paprika is fine.
- ½ teaspoon onion powder
- ½ teaspoon garlic powder
- salt and pepper to taste ribs
- 1 cup BBQ sauce
- foil
Instructions
- Preheat oven to 250 degrees.
- Remove the membrane from the back of the ribs: Turn the rib rack over so the bone side is facing up. The membrane appears as a thin, shiny layer covering the bones. Using a knife, your fingers, or a paper towel for grip, start at one end of the rack and slide the knife or your fingers under the membrane, separating it from the bones.Once you have a good grip on the membrane, lift it gently to separate it from the bones. You can use a paper towel for better grip if it’s slippery.
- Sprinkle the spices over both sides of the ribs and rub them into the meat so it penetrates. Ideally, you should let the dry rub sit on the ribs for at least 30 minutes before baking. However, for even more flavor infusion, consider letting the ribs rest with the dry rub applied for several hours or overnight in the refrigerator (that's optional).
- Wrap the ribs in foil and place them on a sheet pan.
- Bake for 2-3 hours or however long it takes for the ribs to reach your desired texture.The exact cooking time can vary based on the thickness of the ribs and your desired level of tenderness. The meat should have pulled back from the ends of the bones, revealing a bit more of the bone. Use a fork or tongs to gently lift the ribs from one end. They should bend easily and the meat should start to separate from the bone when done.For fall-off-the-bone ribs, cook the ribs until they reach an internal temperature of 200-205 degrees using a meat thermometer.
- When tender, remove the ribs and adjust the oven temperature to Broil.Drizzle the BBQ sauce over the ribs and broil (uncovered) for 4-5 minutes to caramelize the crust. This step is optional.
- Let the ribs rest for 15-20 minutes after removing them from the oven. The resting time may vary depending on the size and thickness of the ribs.If you slice into the ribs too soon, this will cause the juices to escape, leading to drier meat.
Notes
- You can use any cut of ribs in this recipe.
- Use enough spices to fully coat the ribs. Add additional spices if necessary as the servings will vary based on the size of the ribs you use.
- A lot of recipes call for mustard. Mustard is used to rub down the ribs prior to applying the dry rub to help it stick. I don’t have a problem with getting the rub to stick. Feel free to use mustard if you wish.
- You can use any BBQ Rub or seasoning you like. Ensure the ribs are fully coated.
- Foil helps trap steam and moisture, preventing the ribs from drying out during the baking process. This helps the ribs cook in their juices, keeping them tender and flavorful. It also creates a sealed environment that promotes even cooking. It helps distribute heat evenly around the ribs, ensuring they cook uniformly.
Nutrition
Nutrition Data
Macros are provided as a courtesy and should not be construed as a guarantee. This information is calculated using MyFitnessPal.com. To obtain the most accurate nutritional information in a given recipe, you should calculate the nutritional information with the actual ingredients used in your recipe, using your preferred nutrition calculator. You are solely responsible for ensuring that any nutritional information provided is accurate, complete, and useful.
Frequently Asked Questions and Recipe Pro Tips
I'm using baby back in this recipe. They got the name because they are shorter than spare ribs and are closer to the backbone, where the muscles are leaner and more tender. They are also known for being more curved than spare ribs and typically have less meat compared to spare ribs but are considered more tender and flavorful.
Baby Back: Come from the upper part of the pig's ribcage, closer to the backbone. They are shorter in length compared to spare ribs and are curved, with meat between the bones.
Spare: Come from the lower part of the ribcage, closer to the belly. They are longer and flatter than baby back ribs, with more bone and meat.
St. Louis Style: These are spare ribs that have been trimmed to a more rectangular shape, removing the sternum bone, cartilage, and excess flap meat.
I use my Dry Rub For Ribs Recipe. Dry rubs are just that, dry. A mix of spices, salt, a little sugar, maybe some dried herbs, rubbed straight onto the meat so it forms a flavorful crust while it cooks. No liquid, no soaking, just bold seasoning that sticks and builds texture.
Marinades are the opposite. They’re liquid based, usually oil, vinegar, citrus, soy sauce, wine, plus spices and sometimes something sweet. The meat sits in it for hours, sometimes overnight, to soak up flavor and get more tender.
For this recipe, I stick with a dry rub because you can still get tender, fall-off-the-bone ribs right in the oven. I use my Dry Rub for Ribs and let it do its thing. If you prefer a marinade, you can coat the ribs in apple cider vinegar or soy sauce and let them hang out in the fridge overnight. Totally up to you.
The membrane can become tough and chewy when cooked, affecting the overall texture of the ribs. Removing it allows for even and consistent cooking which results in more tender meat. This also allows spices, rubs, marinades, or sauces to penetrate the meat more effectively, enhancing flavor throughout the ribs.
Here's how you remove it:
Locate the Membrane: Turn the rib rack over so the bone side is facing up. The membrane appears as a thin, shiny layer covering the bones.
Loosen the Membrane: Using a knife, your fingers, or a paper towel for grip, start at one end of the rack and slide the knife or your fingers under the membrane, separating it from the bones.
Lift and Pull: Once you have a good grip on the membrane, lift it gently to separate it from the bones. You can use a paper towel for better grip if it's slippery.
Pull Across the Rack: Continue pulling the membrane across the entire rack of ribs. It might come off in one piece or multiple pieces, depending on how well it separates from the meat.
Foil helps trap steam and moisture, preventing the ribs from drying out during the baking process. This helps the ribs cook in their juices, keeping them tender and flavorful. It also creates a sealed environment that promotes even cooking. It helps distribute heat evenly around the ribs, ensuring they cook uniformly.
Bake the ribs at 250 degrees. Baking ribs at a low temperature break down the collagen and connective tissues in the meat gradually over time. This low and slow cooking method allows the ribs to become tender without drying out.
The exact cooking time can vary based on the thickness of the ribs and your desired level of tenderness. You should typically plan for about 2 ½ to 3 hours, maybe even a little more if you like really tender ribs that fall off the bone.
Once the ribs are done cooking, remove them from the oven and loosely cover them with the foil. This helps retain heat while allowing steam to escape, preventing the ribs from becoming soggy. Let them rest for 15-20 minutes. The resting time may vary depending on the size and thickness of the ribs.
If you slice into the ribs too soon, this will cause the juices to escape, leading to drier meat.
Leftovers can be stored tightly covered and sealed for 3-4 days in the fridge.
The best methods are in the oven (250 degrees until warm), on the grill, or in the air fryer (250 degrees).
You can freeze leftover ribs tightly covered and sealed for 4-5 months for optimal freshness. Defrost in the fridge overnight.
Tips For Fall Off The Bone Baby Back Ribs in the Oven
- The meat should have pulled back from the ends of the bones, revealing a bit more of the bone. The surface should also have a nice caramelized color or slight crust.
- Use a fork or tongs to gently lift the ribs from one end. They should bend easily and the meat should start to separate from the bone.
- The ribs have to reach an internal temperature of 145 degrees to be safe to eat. But, for tender ribs, the internal temperature should land around 190-205 degrees. To get them to fall off the bone I usually have to cook them until they reach a temp over 200 degrees.
Serving Oven Roasted Baby Back Ribs
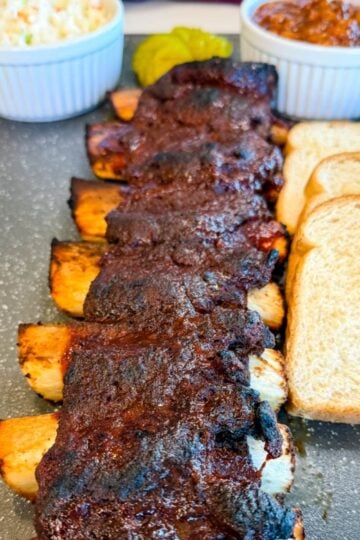
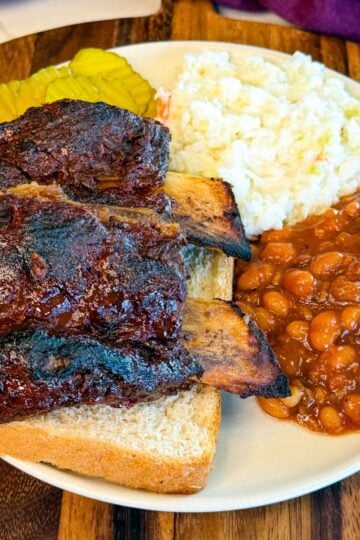
I like to serve them up with classic sides like creamy Southern mac and cheese, baked beans, potato salad, or Southern collard greens—something that can hold its own next to that rich, smoky flavor.
Don’t forget the Southern cornbread or a slice of white bread to soak up the sauce. And if you're going all in, a cold drink and a few paper towels on the side never hurt. This is the kind of meal that brings people to the table fast.
Pair With These Recipes
Bacon Ranch Pasta Salad
Vinegar Coleslaw
Broccoli Salad with Bacon and Cheese
Smoked Mac and Cheese
Southern Baked Beans
Southern Coleslaw
Southern Potato Salad
Southern Soul Food Baked Mac and Cheese
Easy Spaghetti Salad
Southern Macaroni Salad
Crockpot Mac and Cheese
More BBQ and Ribs Recipes
Braised Beef Short Ribs
Country Style Ribs
Slow Cooker Crockpot Ribs
Air Fryer Ribs
BBQ Chicken Drumsticks and Thighs
Traeger Smoked Ribs
How to Grill Ribs on Charcoal or Gas Grill
Baked BBQ Chicken Breast
India says
I’ve never done oven baked ribs before so I wanted to use a guide. I’ve used a few stay snatched recipes before so I decided to try this recipe. Although I used my own spices concoction, everything else was by this recipe. My dad and I loved it!!! If you need an oven baked ribs recipe, this is the one!!!! Thank you!
staysnatched says
Yay! I'm so glad you enjoyed them.
Renee says
I made this today and it was so tender and tasted great! Thanks for this, I will make them again for sure!
staysnatched says
You're welcome! I'm glad to hear you will make them again.