Oven baked beef ribs don’t get talked about enough, but when they’re done right, they’re tender, juicy, and packed with flavor. I’ve been cooking and sharing recipes for over a decade, and I’m native to Kansas City. We are BIG on the BBQ, baby! And I'm big on making sure ribs actually hit, not dry, not bland, not falling short. This method keeps things simple but delivers that rich, slow-cooked flavor right in your oven.
Here's the Tea: With my background cooking ribs and BBQ for years (yes, even back to my college townhouse days 👀), I already know what makes them hit, bold seasoning, moisture, and enough time for that meat to actually get tender.
Beef Ribs Ingredients
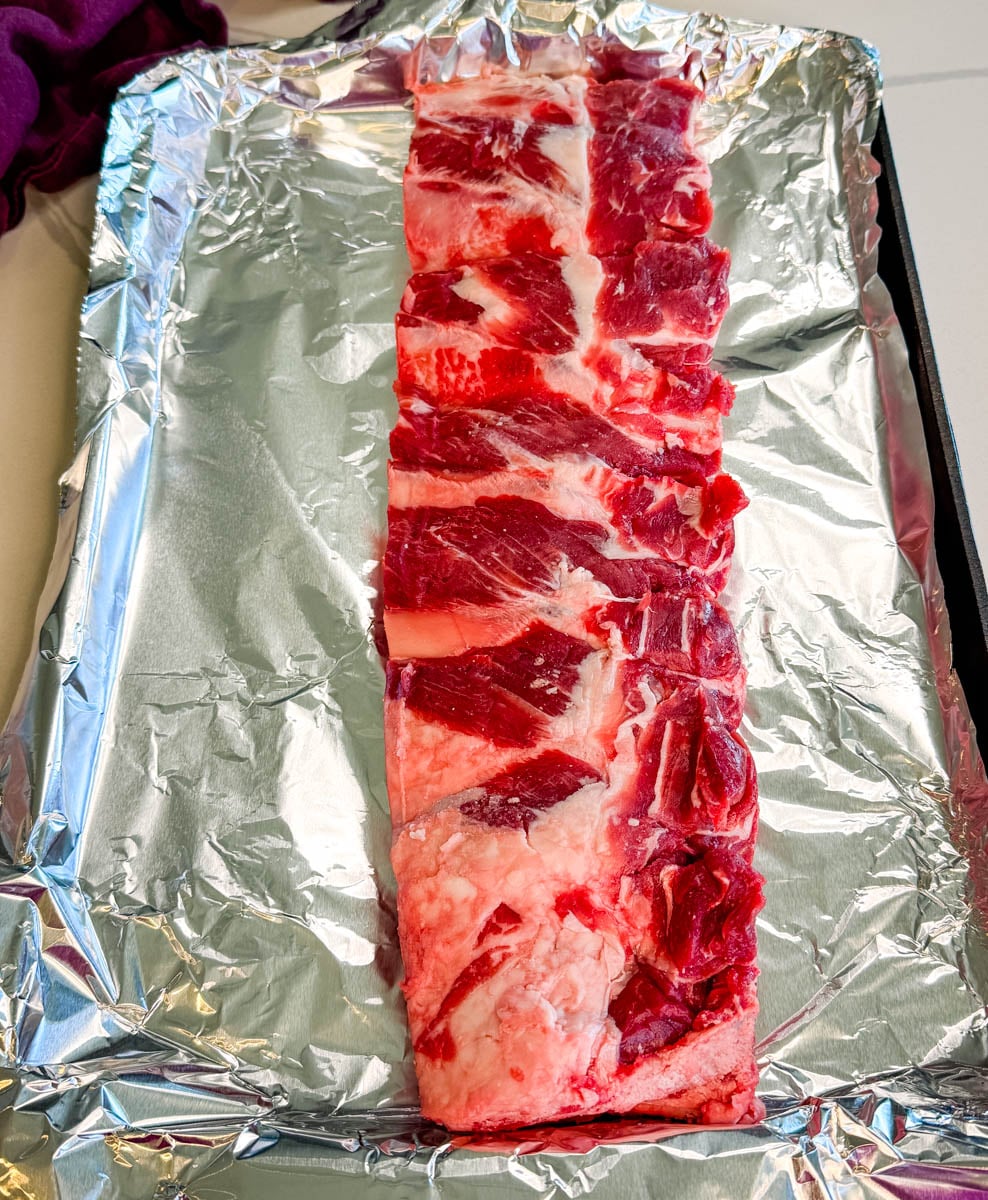
- Beef Ribs: When you’re shopping for beef ribs, skip the guesswork and go where the quality is, a good butcher shop is always your best bet because they’ll have fresher cuts, thicker racks, and can tell you exactly what you’re getting. If you’re at a regular grocery store, head straight to the meat counter instead of grabbing whatever’s pre-packaged, you’ll usually find better options and can even ask them to cut what you need. Pre-packaged ribs are sometimes labeled "plate ribs."
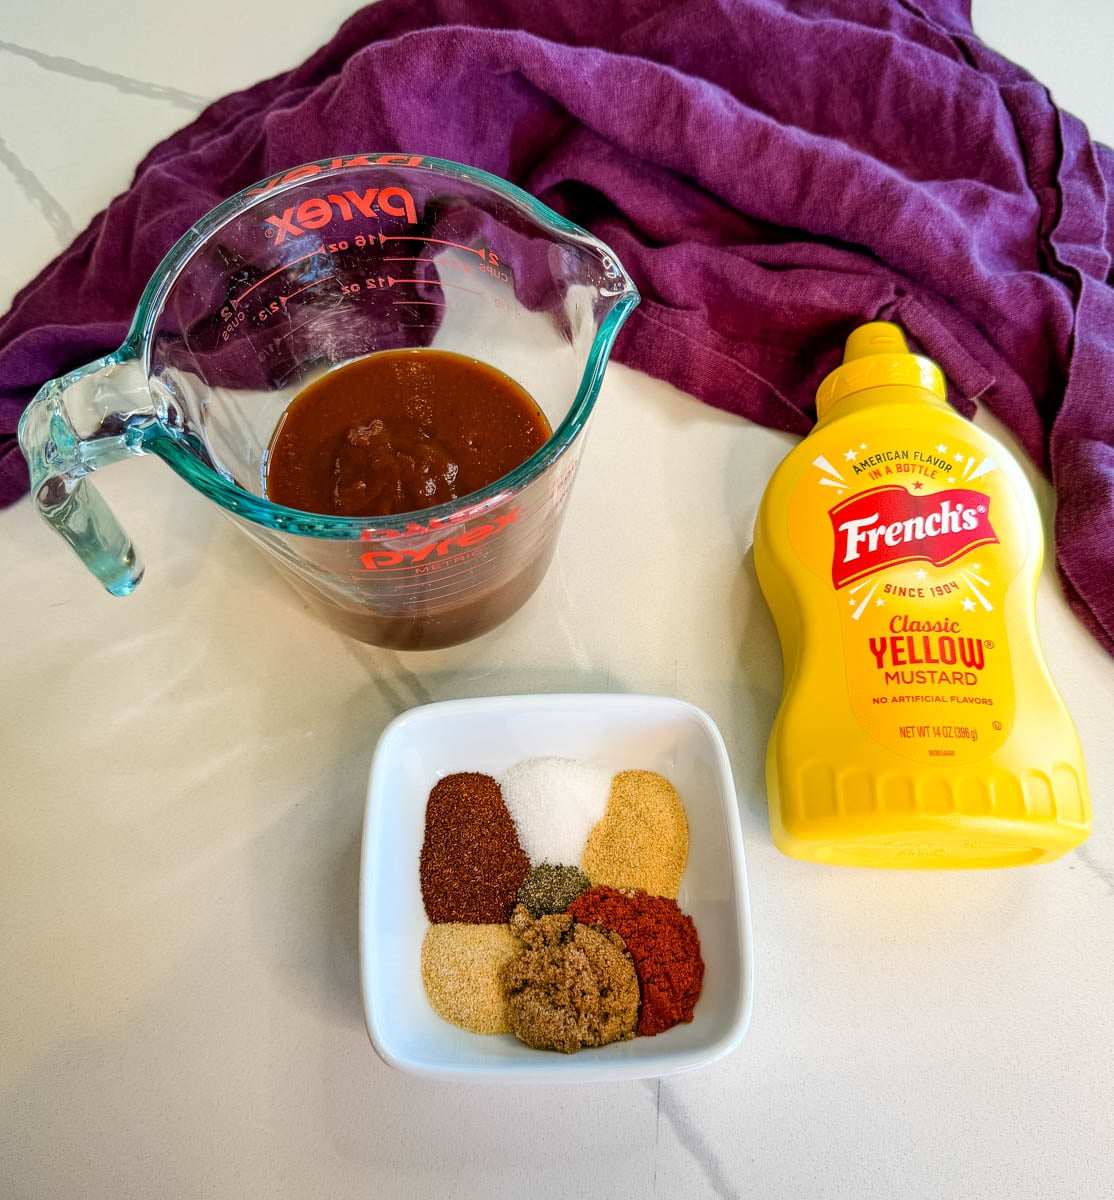
- Mustard: This is used for the binder to get the dry rub to stick. Don't worry, the ribs won't taste like mustard. The taste cooks off. This step is especially clutch if you want that bold, well-seasoned crust. No one will know, but they will taste the difference.
- Brown Sugar or Sweetener
- Chili Powder, Smoked Paprika, Onion Powder, Garlic Powder, Salt, and Pepper (You can also use your favorite BBQ rub instead.)
- BBQ Sauce
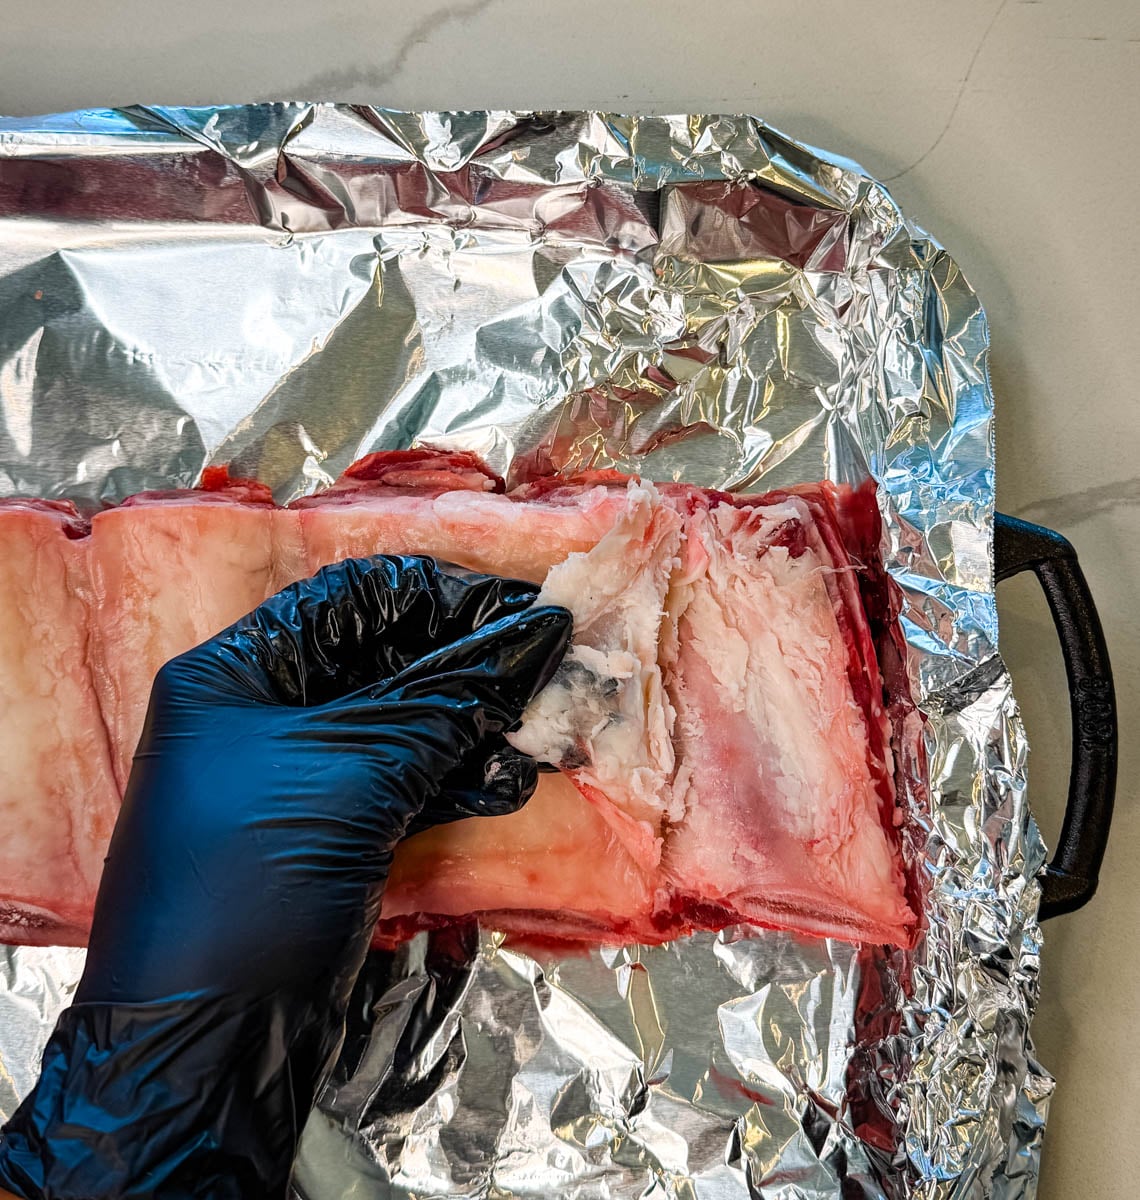
How to Remove the Membrane From the Back of the Ribs
Every rack of ribs has a thick membrane on the back. You will want to remove that to avoid chewy ribs.
- Loosen it first: Slide a butter knife (or the tip of a spoon) under the membrane on the back of the ribs. Start at one of the middle bones where it’s easier to lift, if you're having trouble.
- Use a paper towel for grip: Once you get a corner up, grab it with a paper towel. It’s slippery, and this makes a huge difference.
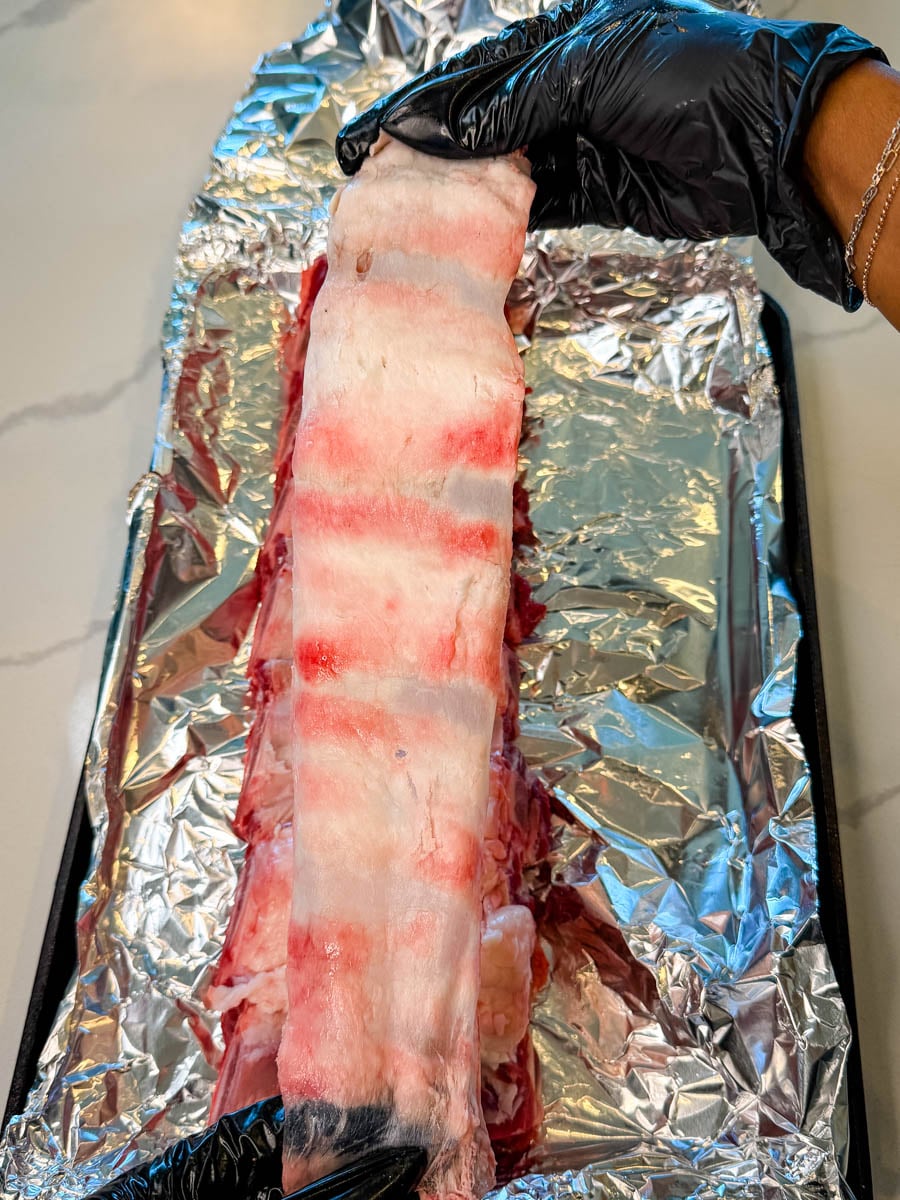
- Pull slow, not fast: Don’t yank it. Pull it back slowly in one steady motion so it comes off in one piece.
- Work in sections if needed: If it tears (it always happens to me), just lift another edge and keep going until it’s all off.
- Do it while the ribs are cold: It’s way easier straight from the fridge. Warm ribs = slippery mess.
Want to save this recipe for later?
How to Make Beef Ribs
Detailed measurements and full instructions can be found in the recipe card at the bottom of this post.
- Prep the ribs: Pat the ribs dry with paper towels. Flip them over and remove the membrane from the back if it hasn’t already been removed, this helps them get more tender and lets the seasoning soak in.
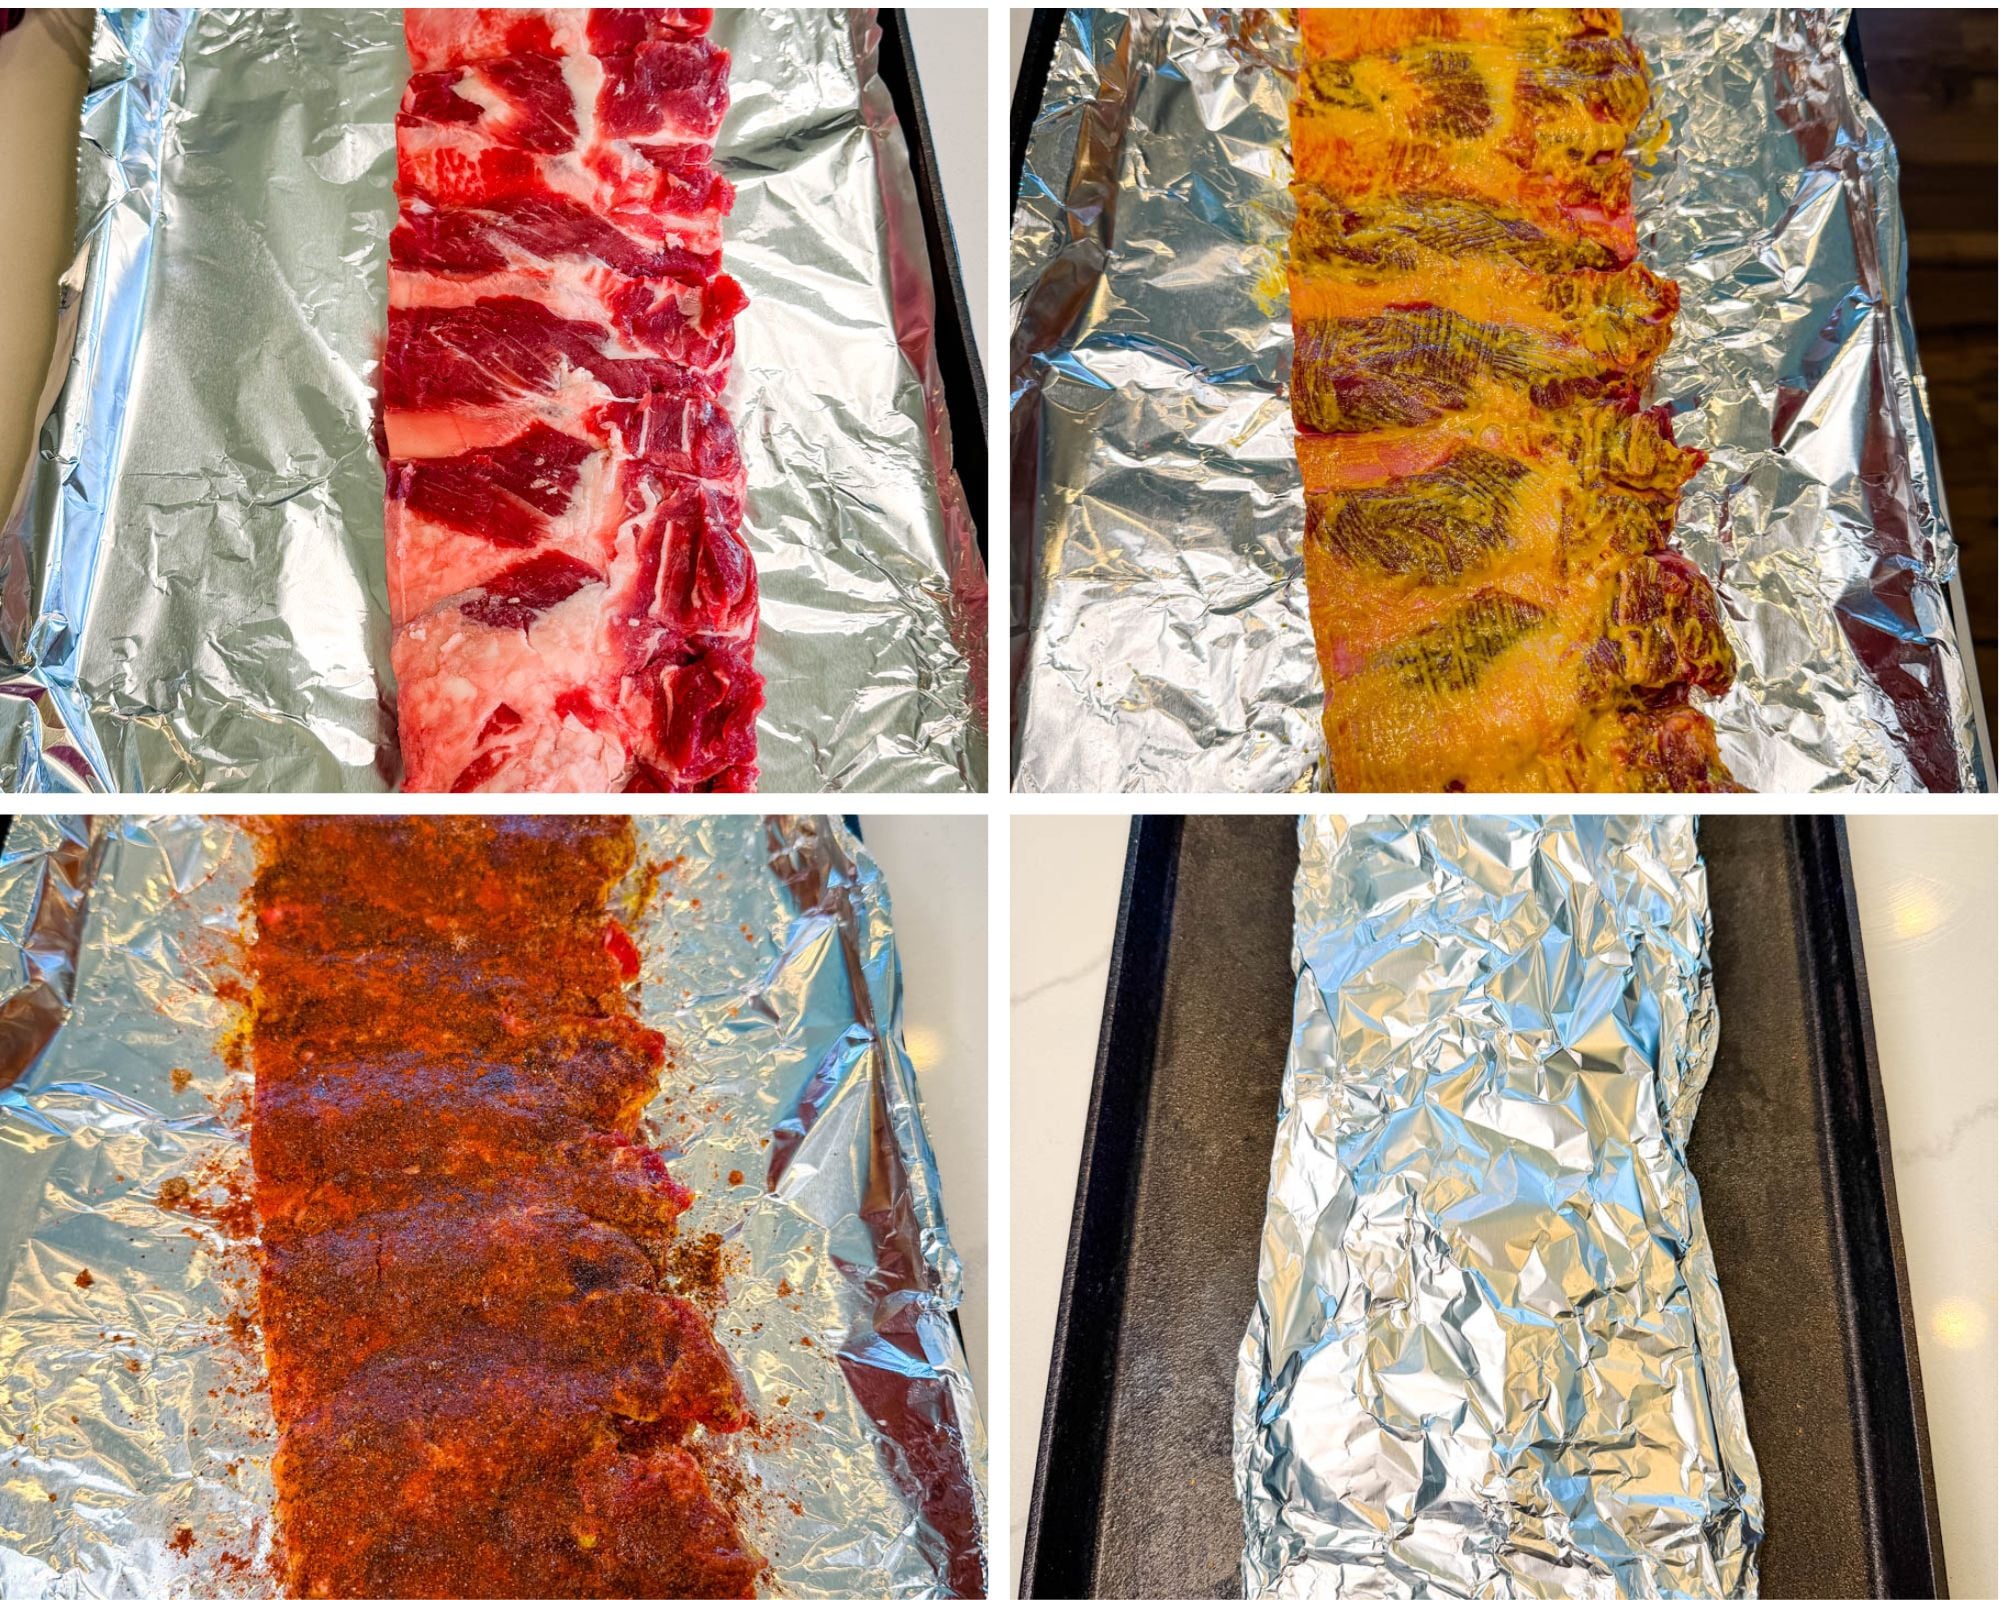
- Add mustard: Lightly coat the ribs with yellow mustard on all sides. Don’t worry, it won’t taste like mustard once cooked, it just helps the seasoning stick and builds a better crust.
- Season: Season generously with brown sugar, chili powder, smoked paprika, garlic powder, onion powder, salt, and pepper, or your favorite BBQ rub. Make sure you season both sides and press it in. Add more spices if you need it. You shouldn't see any bare, unseasoned spots.
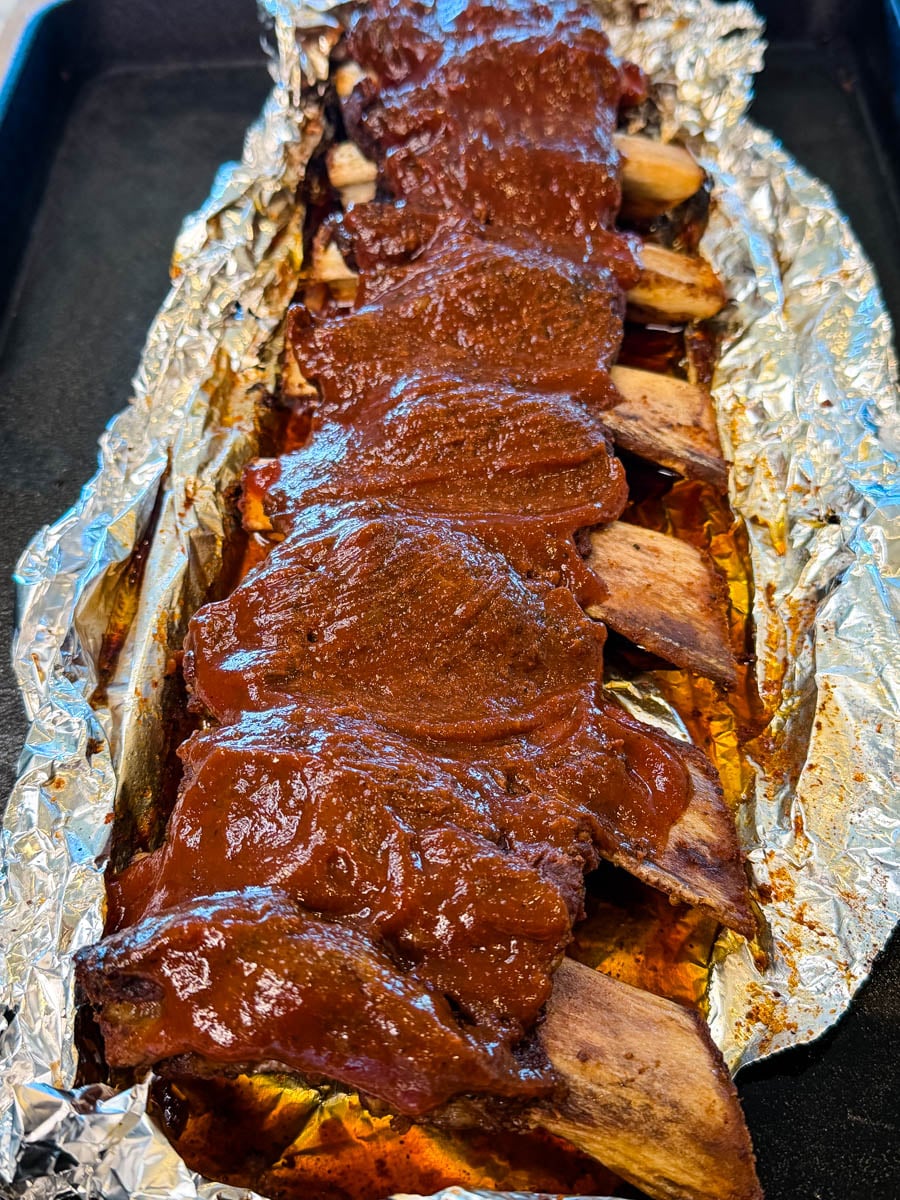
- Wrap for moisture: Place the ribs on a large sheet of foil. Wrap tightly so no steam escapes. I place them on a sheet pan after wrapping.
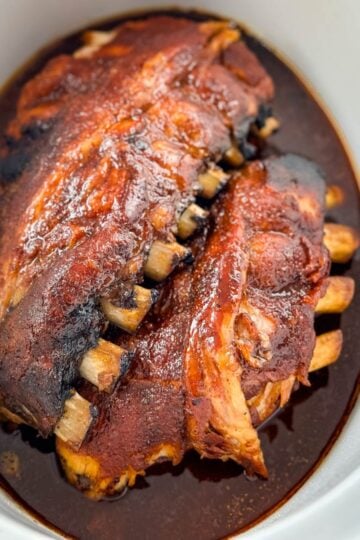
- Bake low and slow: Preheat oven to 250°F. Place the wrapped ribs on a baking sheet and bake for 2 ½ to 3 hours, until the ribs are tender and the meat starts to pull back from the bones. Mine are usually ready around 2 hours and 45 minutes.
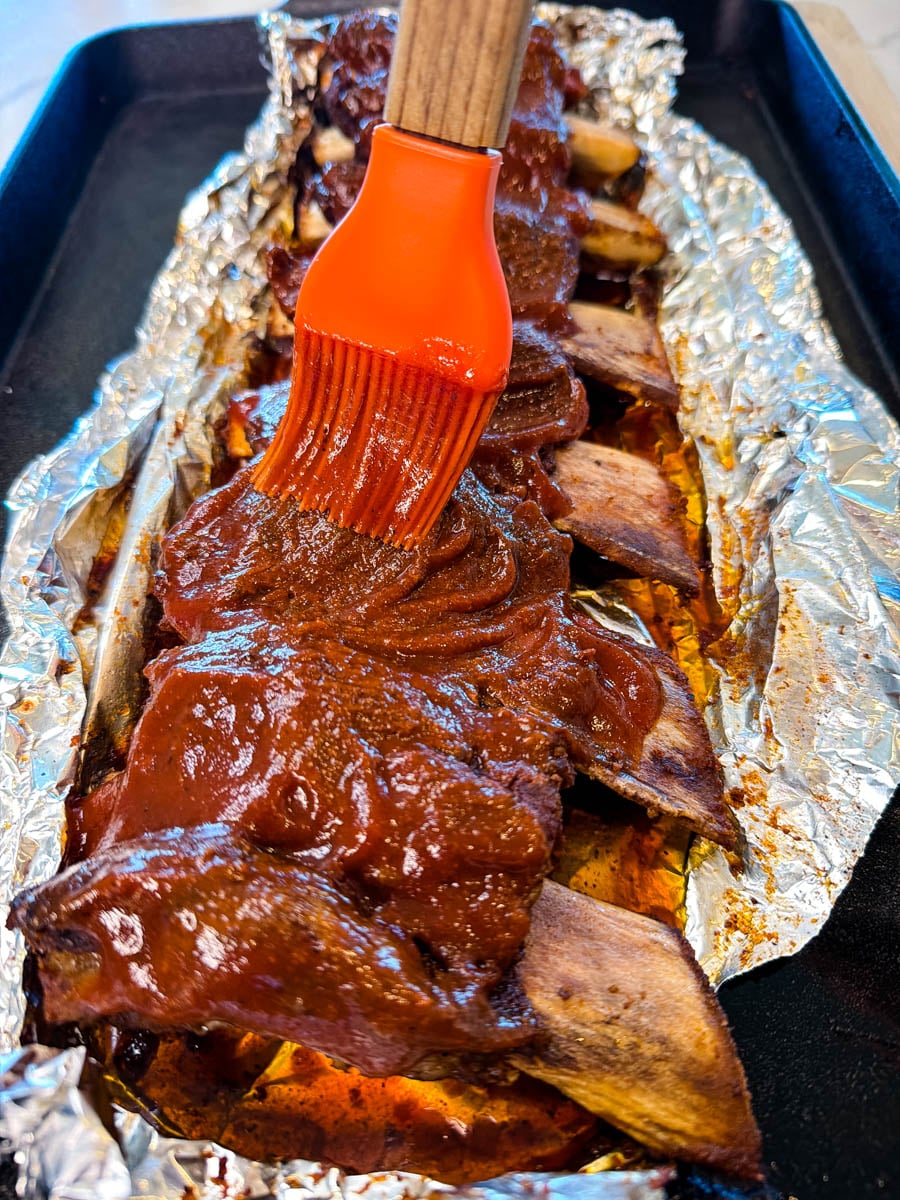
- Add sauce (optional): Remove the ribs from the foil and place them back on the baking sheet. Brush with BBQ sauce if you like.
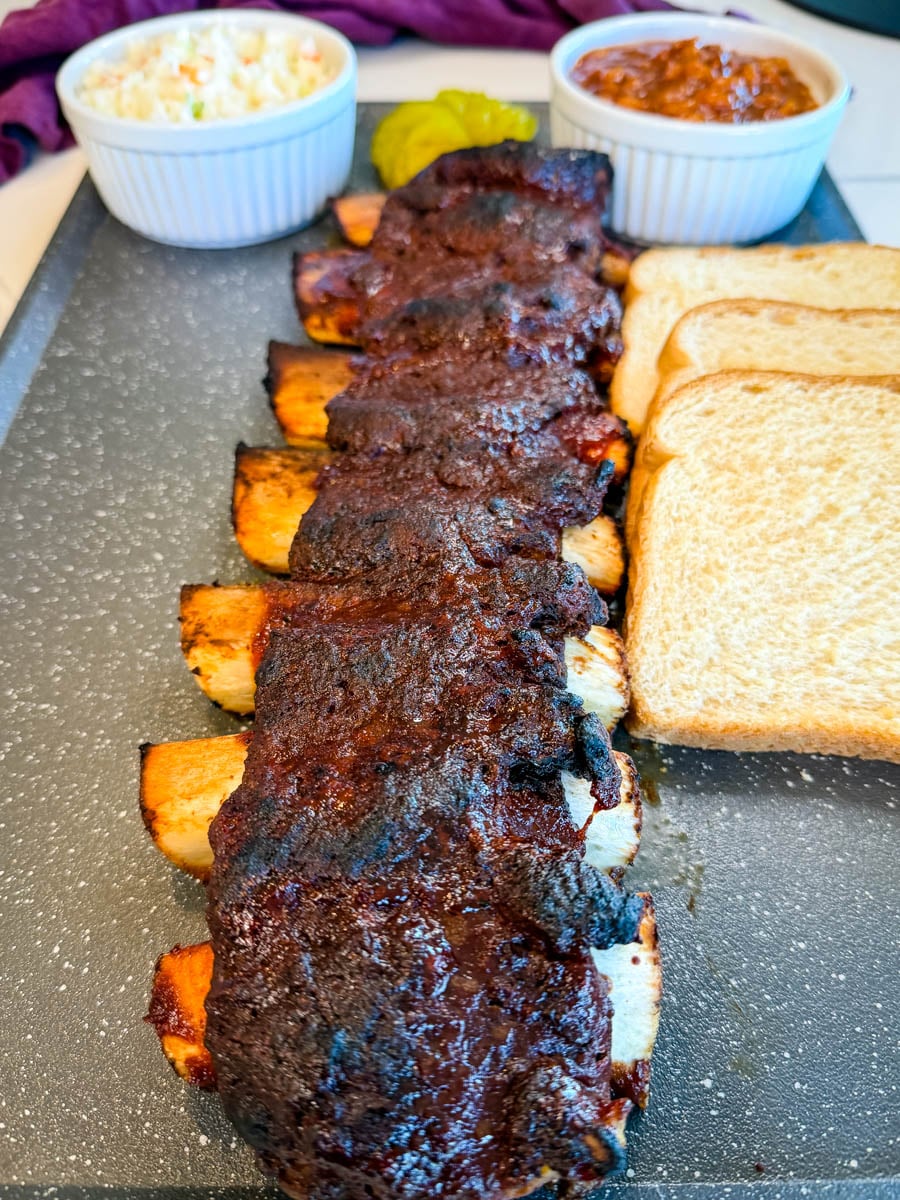
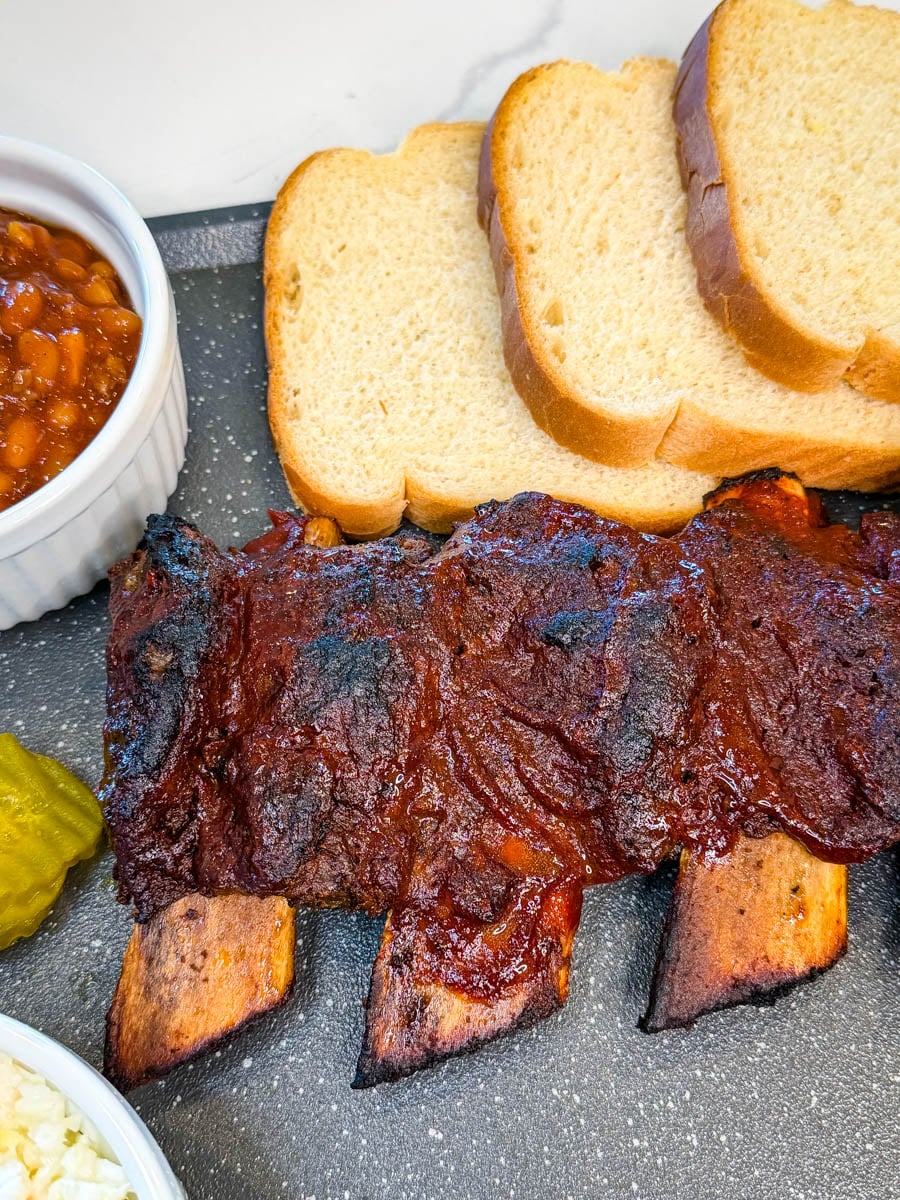
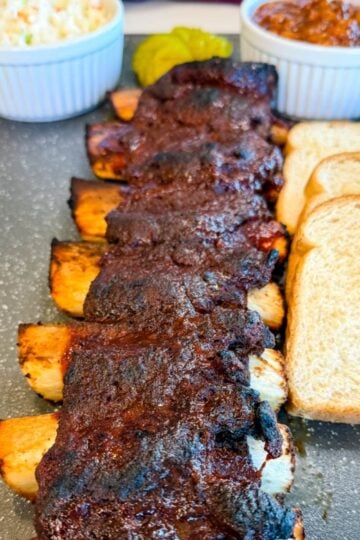
- Finish for texture: Increase oven temperature to 400°F or switch to broil. Cook uncovered for 4-5 minutes until the sauce is caramelized and the edges get slightly crisp.
- Rest and serve: Let the ribs rest for a few minutes, then slice between the bones and serve.

Baked Beef Ribs Recipe
Want to save this recipe for later?
Equipment
Ingredients
- 3-5 pounds rack beef ribs
- 2 tablespoons yellow mustard Dijon mustard works, too. See notes.
- 2 teaspoons brown sugar or sweetener
- 1 ½ teaspoons chili powder
- 1 ½ teaspoons smoked paprika
- 1 teaspoon onion powder
- 1 teaspoon garlic powder
- salt and pepper to taste
- 1 cup bbq sauce
- foil
Instructions
- Pat the ribs dry with paper towels. Flip them over and remove the membrane from the back if it hasn’t already been removed, this helps them get more tender and lets the seasoning soak in.3-5 pounds rack beef ribs
- Lightly coat the ribs with yellow mustard on all sides. Don’t worry, it won’t taste like mustard once cooked, it just helps the seasoning stick and builds a better crust.2 tablespoons yellow mustard
- Season generously with brown sugar, chili powder, smoked paprika, garlic powder, onion powder, salt, and pepper, or your favorite BBQ rub. Make sure you season both sides and press it in. Add more spices if you need it. You shouldn't see any bare, unseasoned spots.2 teaspoons brown sugar or sweetener, 1 ½ teaspoons chili powder, 1 ½ teaspoons smoked paprika, 1 teaspoon onion powder, 1 teaspoon garlic powder, salt and pepper to taste
- Place the ribs on a large sheet of foil. Wrap tightly so no steam escapes. I place them on a sheet pan after wrapping.foil
- Preheat oven to 250°F. Place the wrapped ribs on a baking sheet and bake for 2 ½ to 3 hours, until the ribs are tender and the meat starts to pull back from the bones. Mine are usually ready around 2 hours and 45 minutes.For fall-off-the-bone ribs, cook the ribs until they reach an internal temperature of 200-205 degrees using a meat thermometer.
- Remove the ribs from the foil and place them back on the baking sheet. Brush with BBQ sauce if you like.1 cup bbq sauce
- Increase oven temperature to 400°F or switch to broil. Cook uncovered for 4-5 minutes until the sauce is caramelized and the edges get slightly crisp.
- Let the ribs rest for a few minutes, then slice between the bones and serve.
Notes
- Loosen it first: Slide a butter knife (or the tip of a spoon) under the membrane on the back of the ribs. Start at one of the middle bones where it’s easier to lift.
- Use a paper towel for grip: Once you get a corner up, grab it with a paper towel. It’s slippery, and this makes a huge difference.
- Pull slow, not fast: Don’t yank it. Pull it back slowly in one steady motion so it comes off in one piece.
- Work in sections if needed: If it tears (it always happens to me), just lift another edge and keep going until it’s all off.
- Do it while the ribs are cold: It’s way easier straight from the fridge. Warm ribs = slippery mess.
Nutrition
Nutrition Data
Macros are provided as a courtesy and should not be construed as a guarantee. This information is calculated using MyFitnessPal.com. To obtain the most accurate nutritional information in a given recipe, you should calculate the nutritional information with the actual ingredients used in your recipe, using your preferred nutrition calculator. You are solely responsible for ensuring that any nutritional information provided is accurate, complete, and useful.
Frequently Asked Questions and Recipe Pro Tips
Back ribs or short ribs both work, but they cook a little differently. If you want short ribs, make my Braised Short Ribs recipe. Back ribs are meatier between the bones. You want ribs with good marbling for flavor.
Yes, if it’s still on there. That tough silver skin on the back can make the ribs chewy and block seasoning. Slide a knife under it and pull it off.
Low and slow is the move. 250°F is ideal for tender ribs that don’t dry out.
Usually 2.5 to 3.5 hours depending on the size. You’re not rushing beef ribs, they need time to break down and get tender.
They need more time. These require low and slow cooking to break down and get tender.
You don’t have to, but a good dry rub or seasoning blend is a must. Letting them sit with seasoning for a bit helps build flavor.
Wrapping (in foil) helps lock in moisture and makes them more tender, especially in the oven.
Cook low and slow and don’t skip the wrapping.
Check out my Air Fryer Ribs recipe.
Yes. Cook them, then reheat low and slow with a little moisture (like broth or BBQ sauce, 2-4 tablespoons) to keep them juicy.
Store in an airtight container in the fridge for up to 4 days.
Wrap them tightly and freeze for up to 3 months.
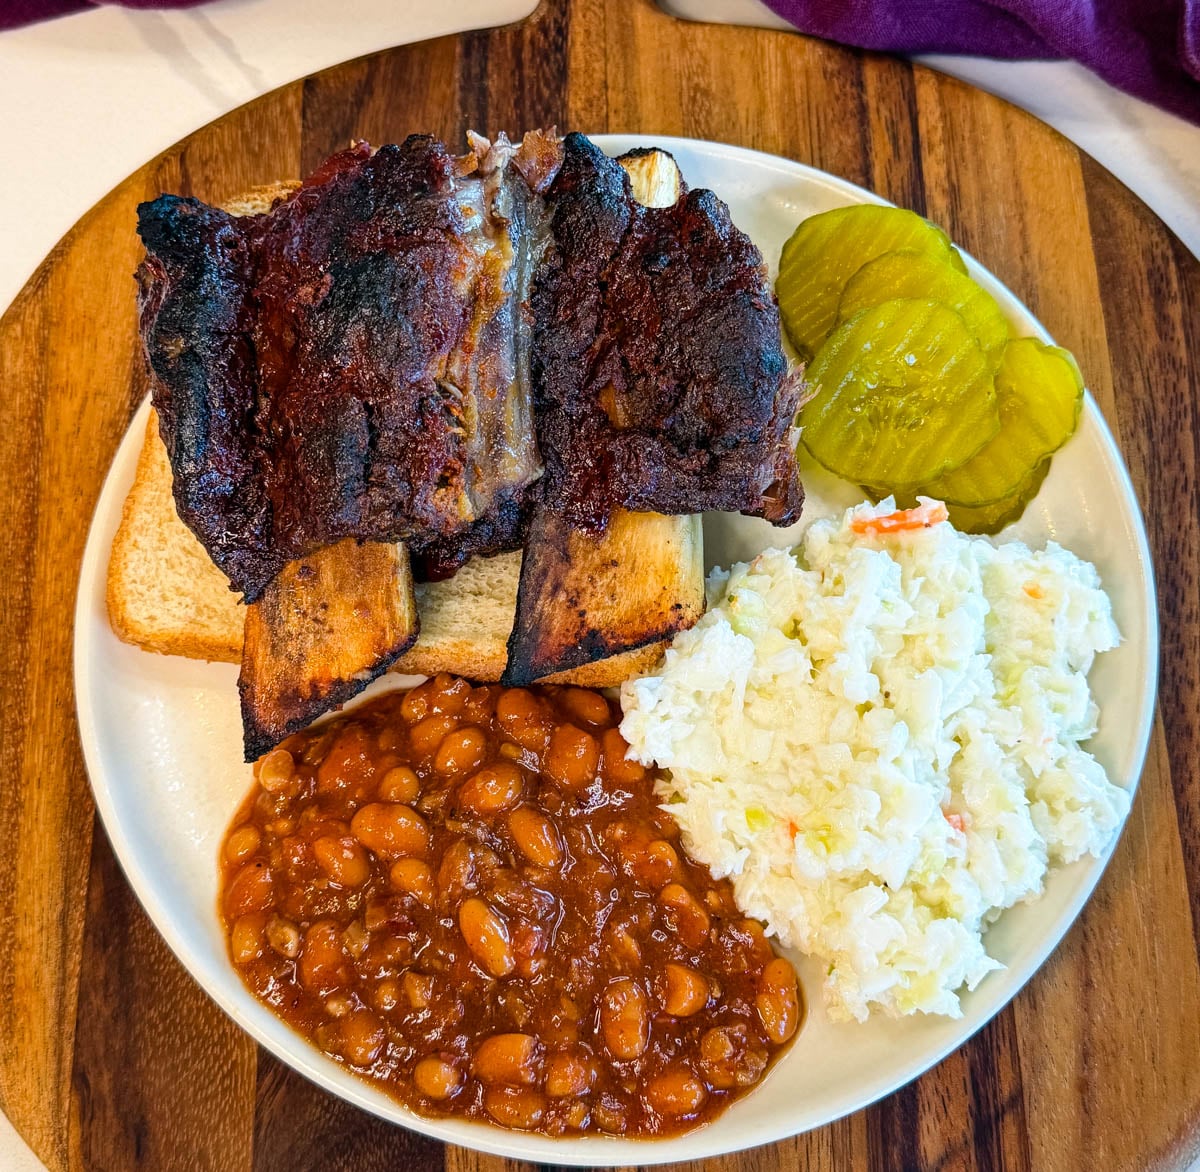
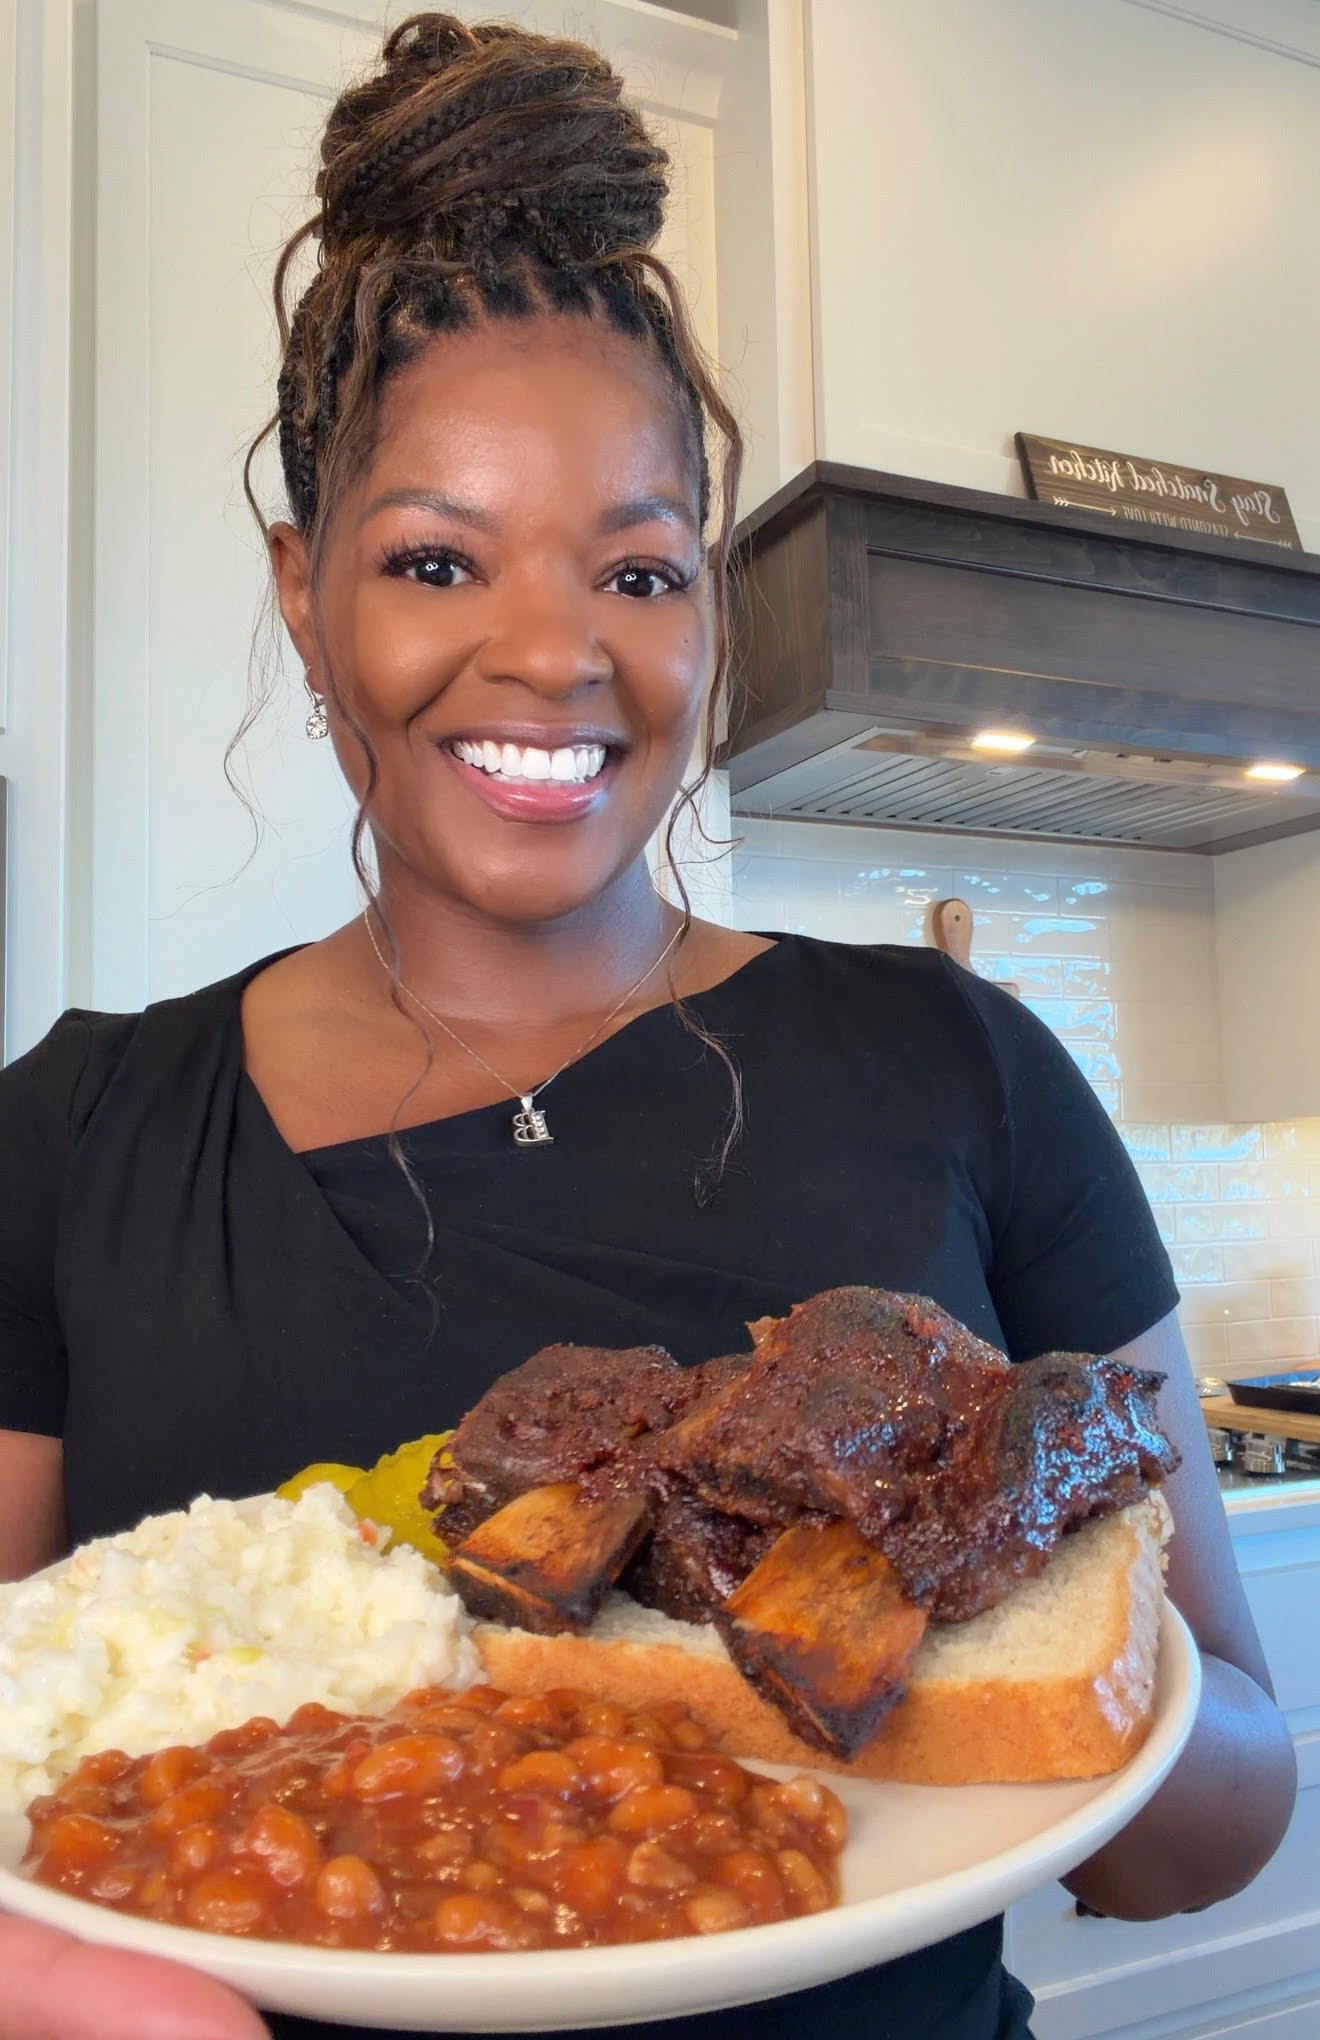
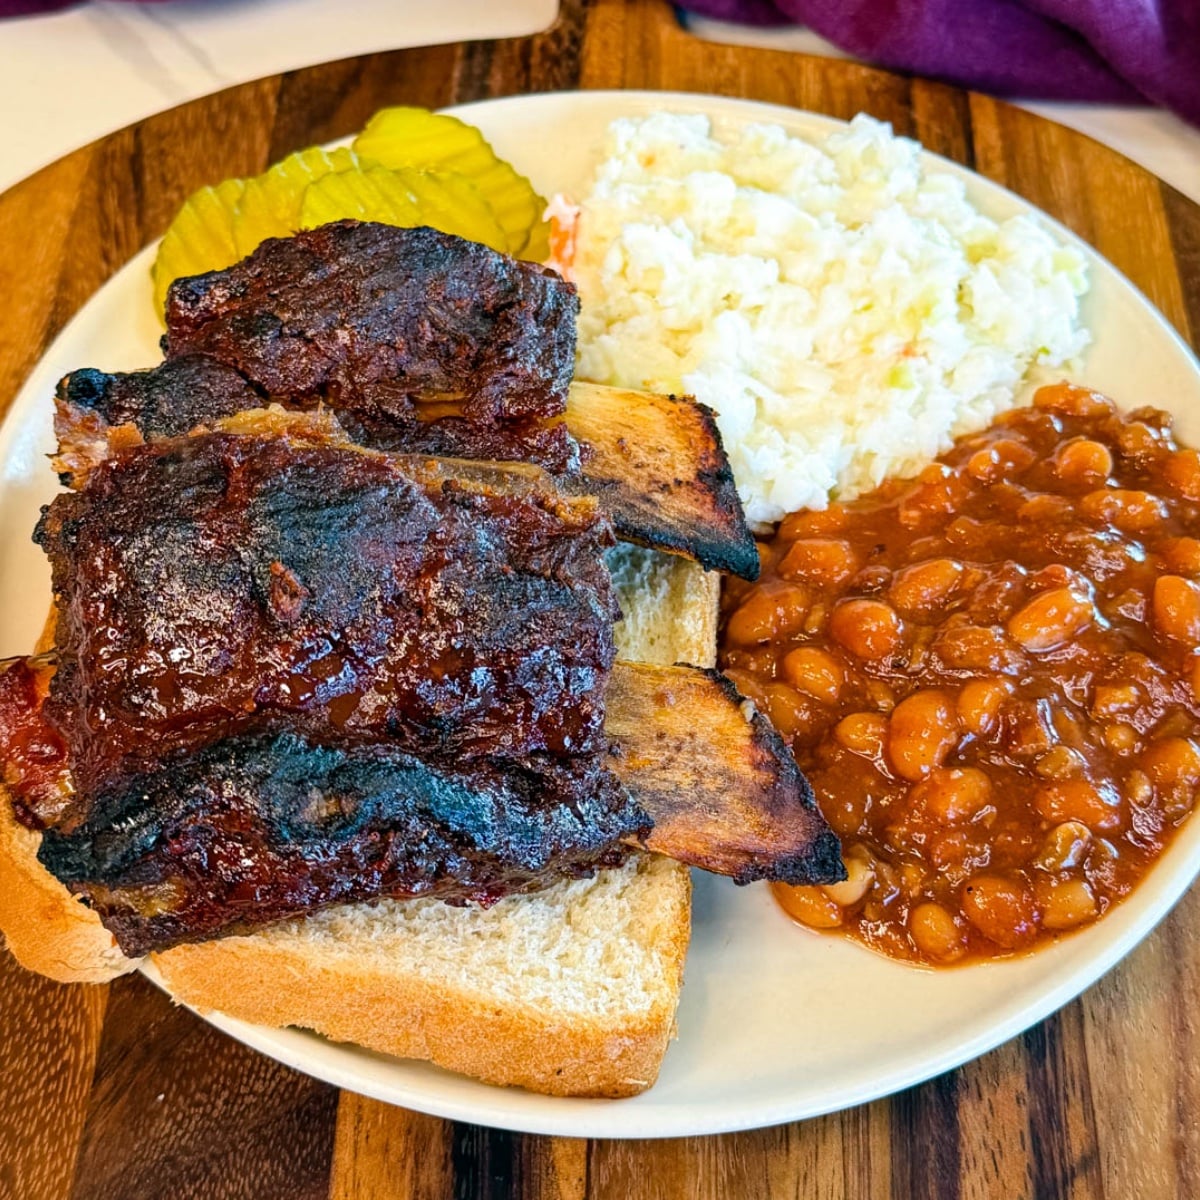
What to Pair with Ribs
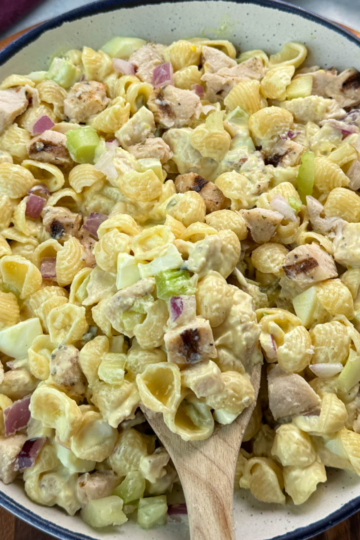
I love to go with classic cookout sides like Southern baked beans with bacon, creamy Southern coleslaw, Southern potato salad, and Southern mac and cheese. Pickles and white bread are also a classic pairing.
Leave a Reply