
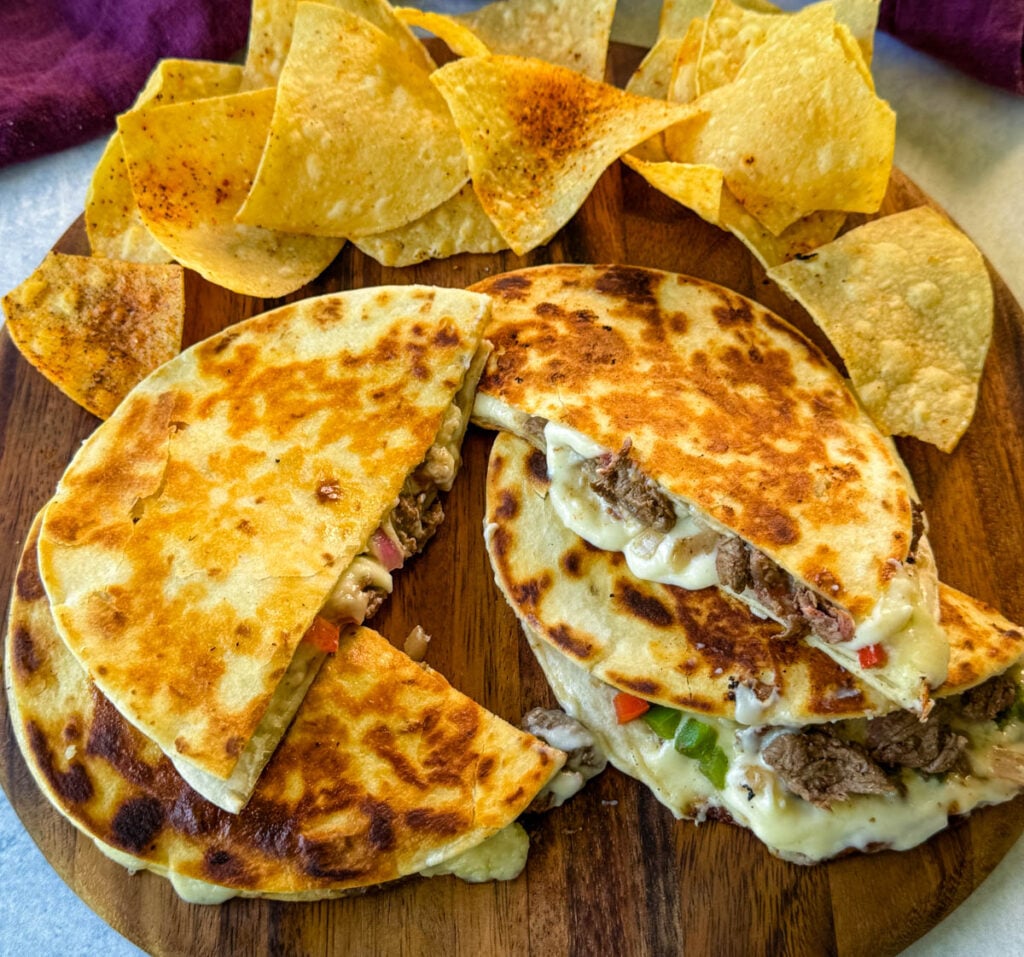
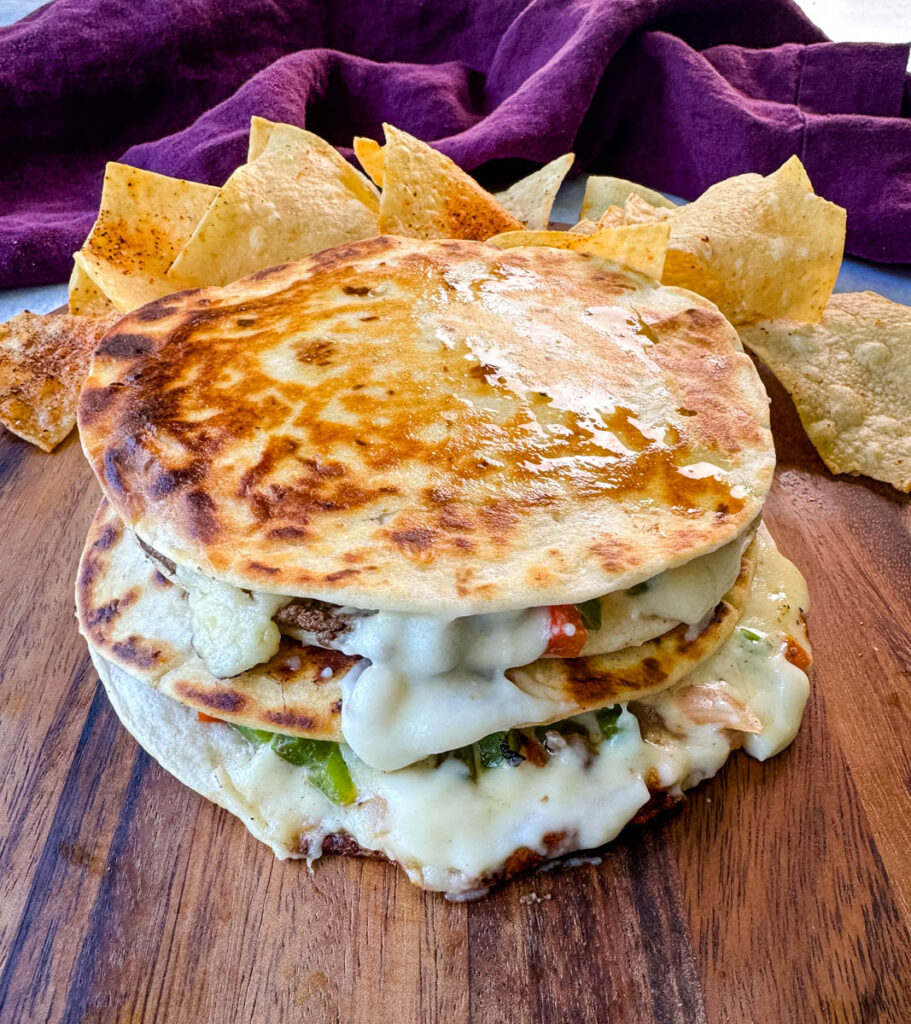
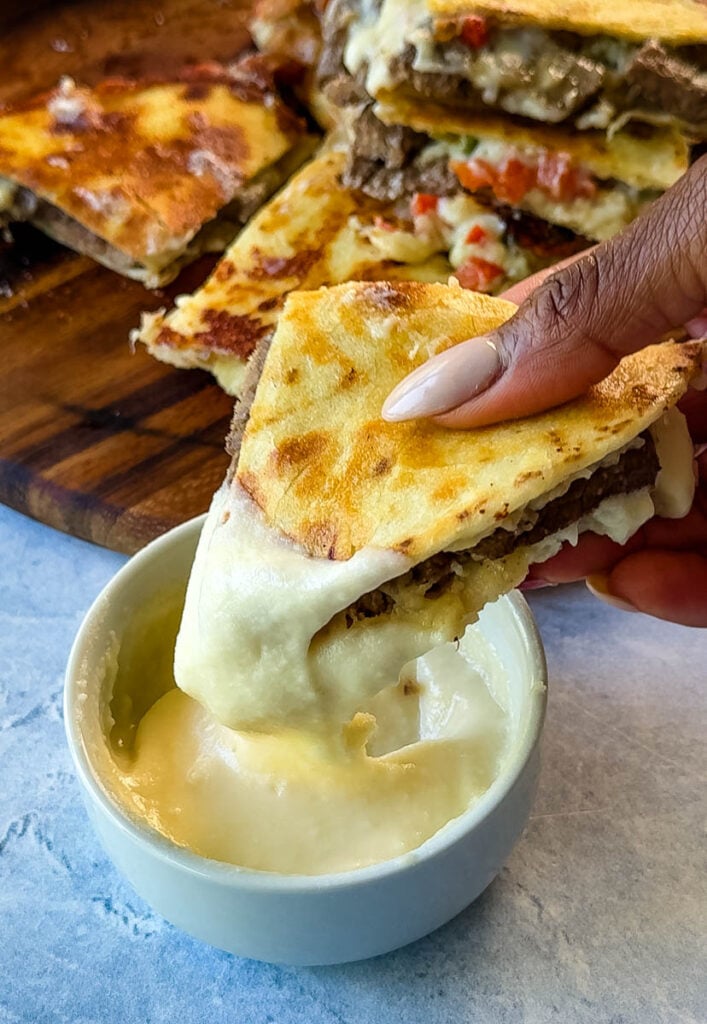
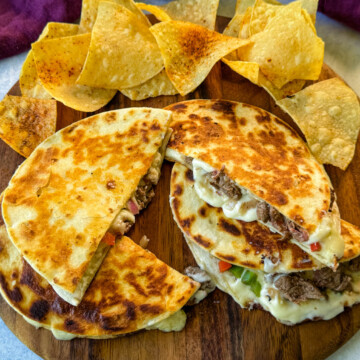
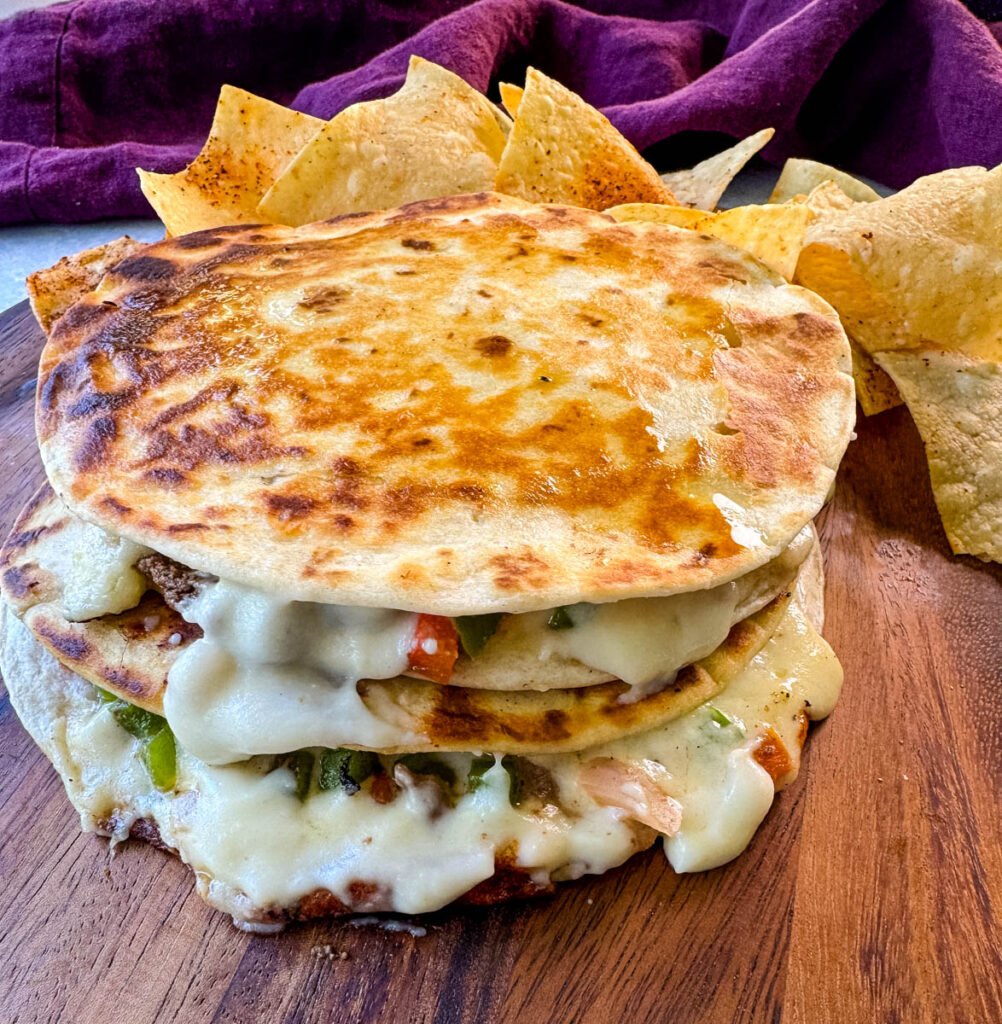
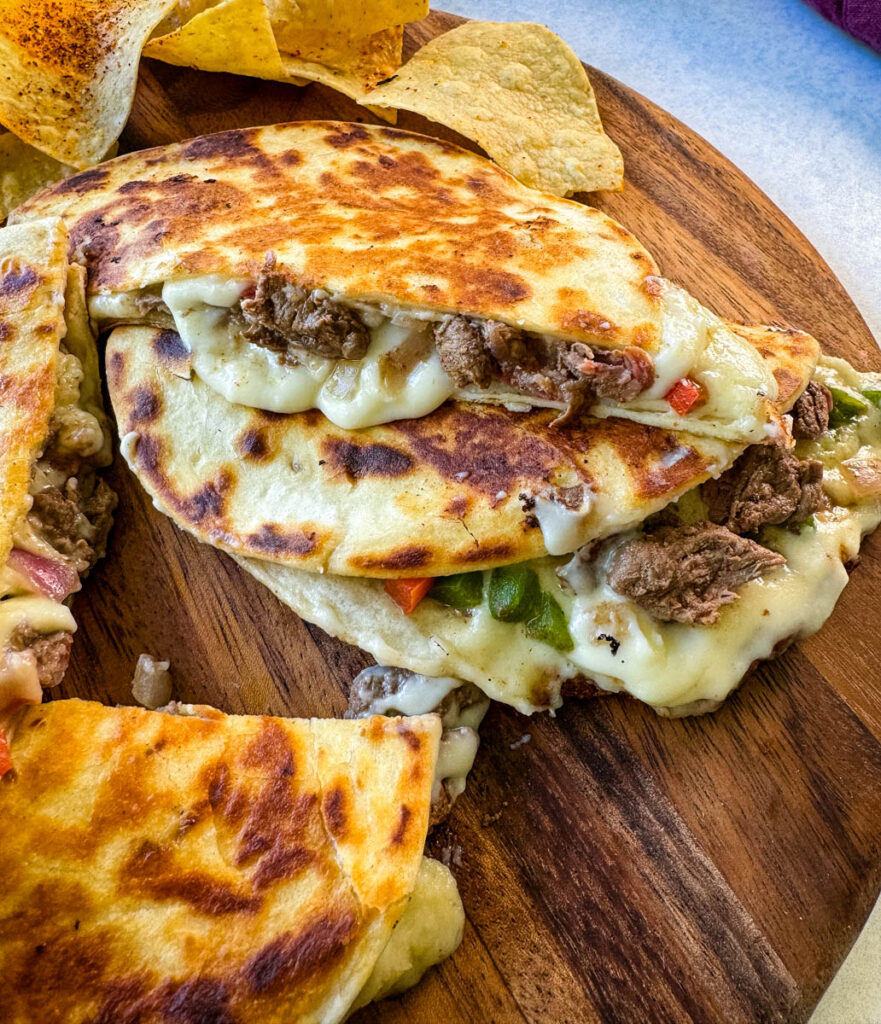
Listen, I love a good Philly cheesesteak, but putting all that goodness inside a quesadilla might actually be better. These Philly Cheesesteak Quesadillas are packed with juicy steak, sautéed peppers and onions, and lots of melted cheese, all toasted until the tortilla is perfectly crispy. I also have my homemade cheez whiz for you, too! It's the standout flavor element I couldn't get enough of when I tested this recipe!
You will also love my Cheeseburger Quesadillas, Pizza Quesadillas, and Ground Beef Quesadilla Crunch Wraps.
Philly Cheesesteak Quesadilla Ingredients
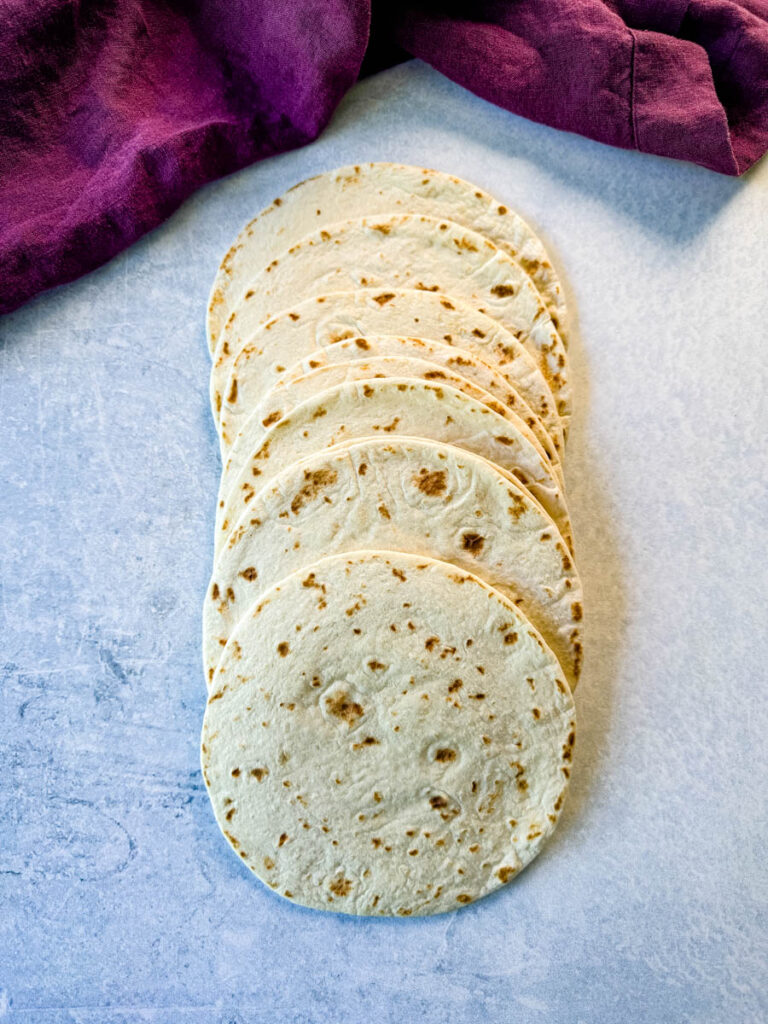
- Tortillas: You can use whatever style and type you like and prefer. 8 inch is standard size. Flour tortillas, corn tortillas, or whole wheat will work well.
- Butter
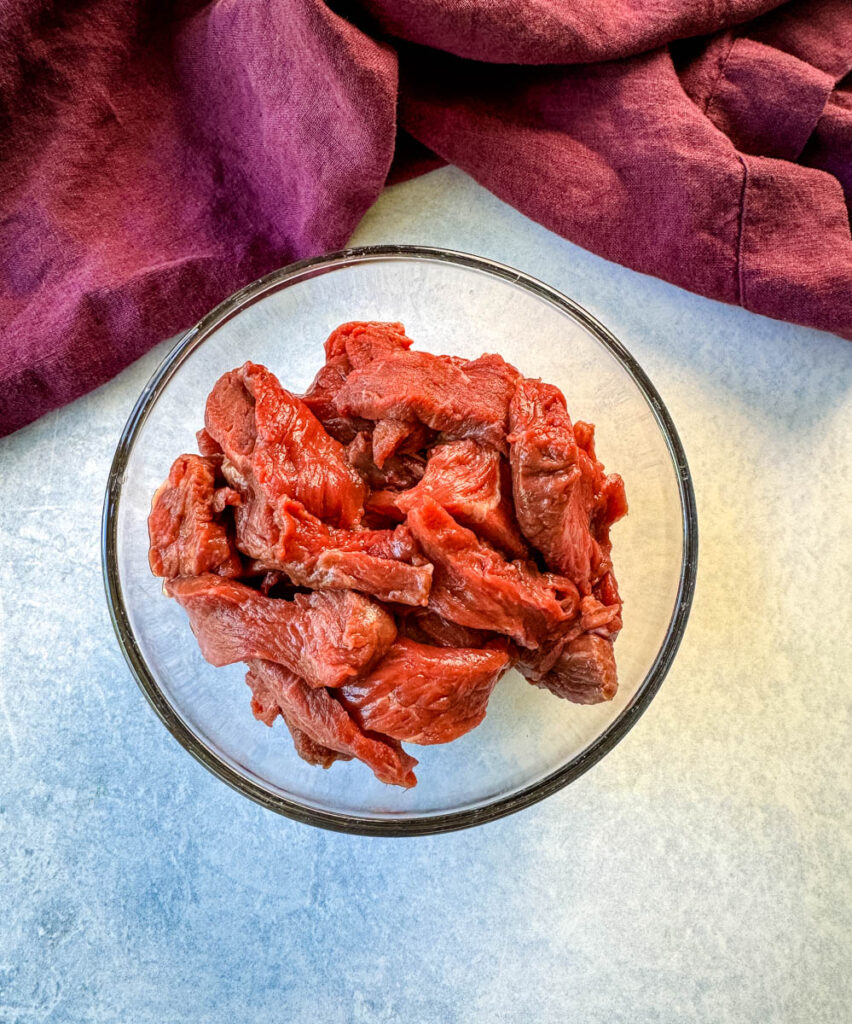
- Steak: I like to use ribeye. Top round, sirloin, skirt steak, and flank steak will also work.
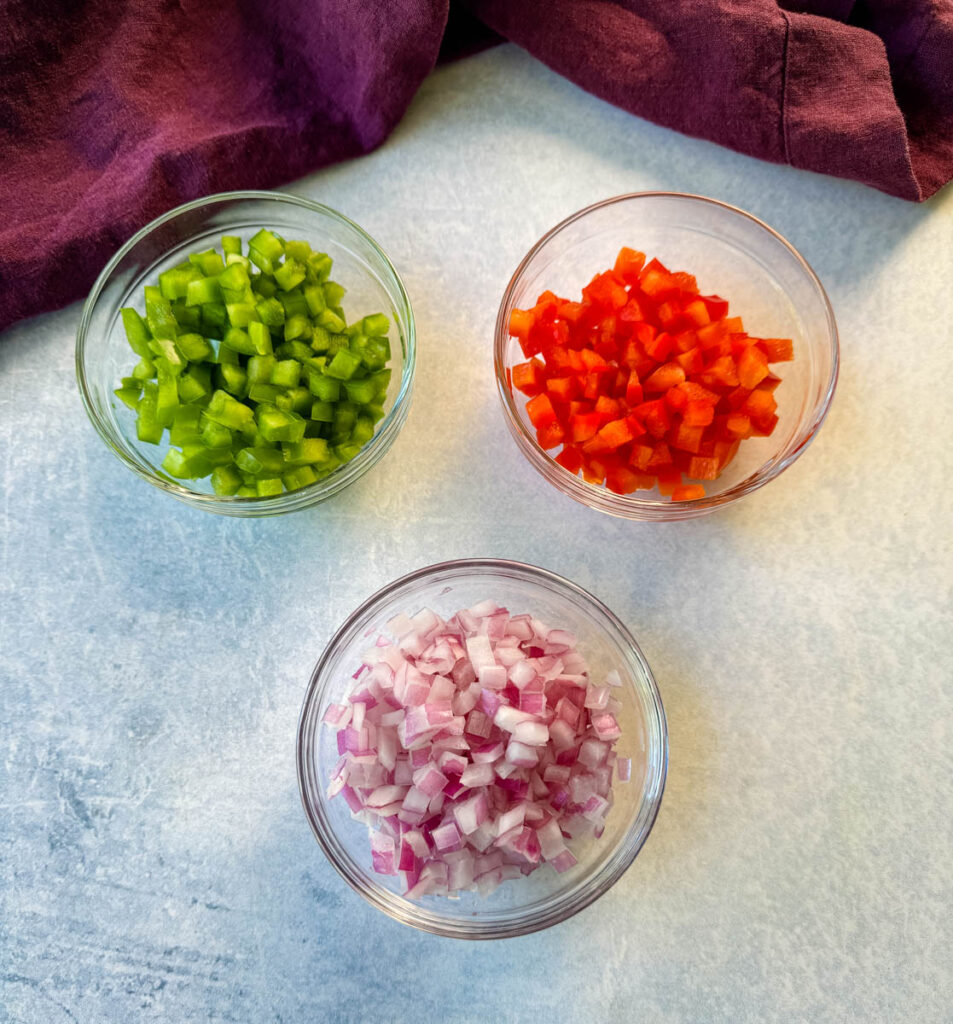
- Bell Peppers
- Onions
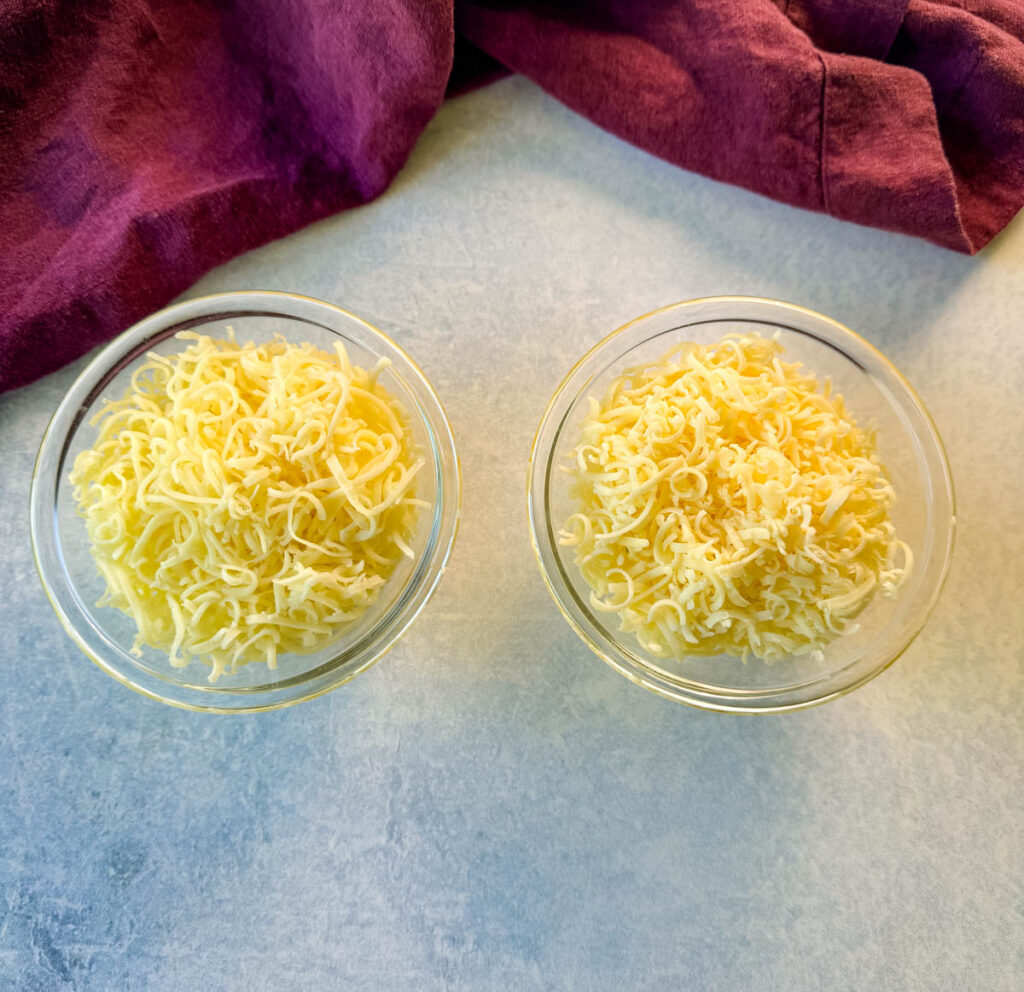
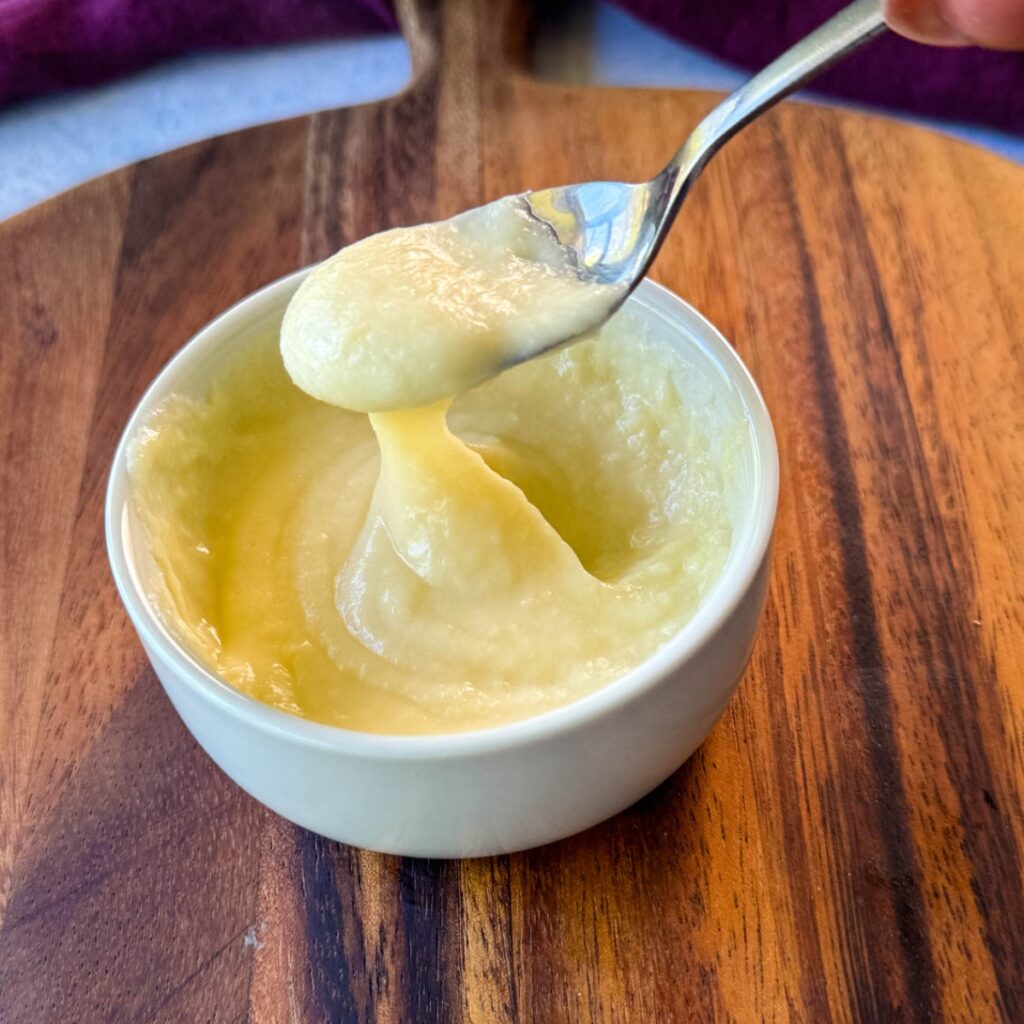
- Cheese: If you want a classic Philly, use Cheez Whiz. This processed cheese sauce is the traditional choice for Philly cheesesteaks. It adds a creamy, tangy flavor. I like to make my own Homemade Cheez Whiz using a few simple ingredients. You can also skip this step and use sliced cheese, like provolone, American, and mozzarella.
- Steak Seasoning
How to Make Philly Cheesesteak Quesadillas
Detailed measurements and full instructions can be found in the recipe card at the bottom of this post.
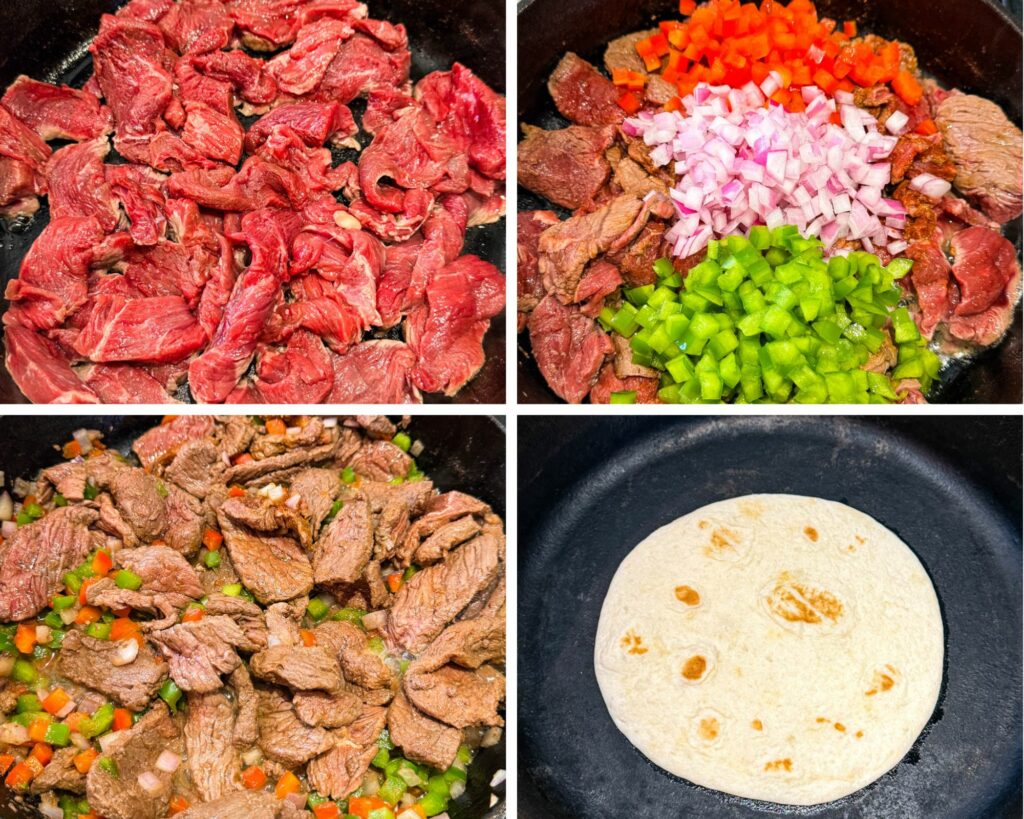
- Heat a skillet over medium-high heat and add the thinly sliced steak to the skillet. Season with spices.
- In the same skillet, add the onions and bell peppers and sauté until they are soft and caramelized, about 4-5 minutes.
- Divide the Cheez Whiz, cooked steak, sautéed onions, and bell peppers evenly among the tortillas.
- Top each with another tortilla to form a sandwich.
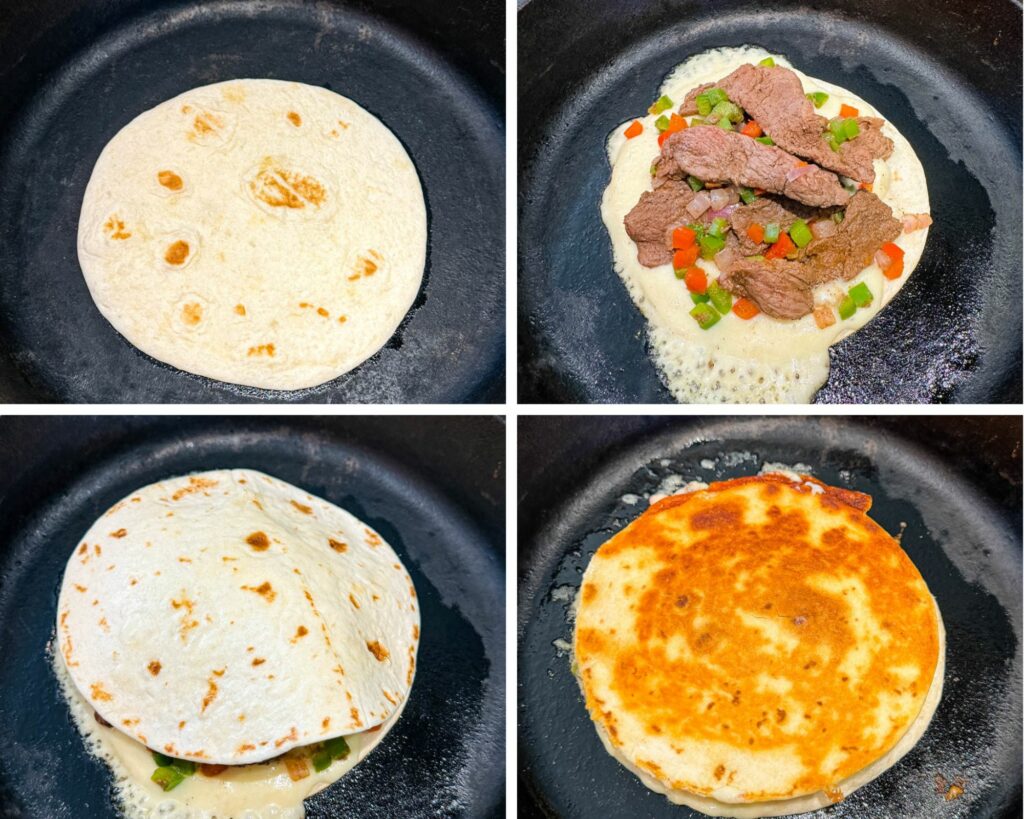
- Add a tortilla to the skillet. Cook in batches if necessary.
- Cook for 2-3 minutes on each side or until golden brown and crispy, and the cheese is melted.
Want to save this recipe for later?
Philly Cheesesteak Quesadillas
Want to save this recipe for later?
Equipment
Ingredients
- 12-16 oz steak Thinly sliced into strips.
- ¼ cup diced green peppers
- ¼ cup diced red peppers
- ½ cup diced onions
- ½ teaspoon garlic powder
- ½ teaspoon smoked paprika
- salt and pepper to taste
- 1 teaspoon olive oil or butter You may need oil or butter for each quesadilla you prepare depending on the type of pan you use.
- 8-inch tortillas
Homemade Cheez Whiz Sauce (Optional, Use Store Bought if you wish)
- 2 tablespoons butter
- 1 tablespoon flour
- 1 cup milk I used 2%. See notes.
- 2 cups grated cheese I used provolone.
- ½ teapoon garlic powder
- salt and pepper to taste
Instructions
Homemade Cheez Whiz Sauce:
- In a small saucepan or skillet, melt the butter over medium heat.
- Whisk in the flour and cook for 1-2 minutes until fully incorporated. This will create a roux that will thicken the sauce.
- Slowly pour in the milk while whisking continuously to prevent lumps from forming.
- Stir in the grated cheese until melted and smooth.
- Add garlic powder, salt, and pepper to taste. Remove from heat and set aside.
Prepare the Steak Filling
- Heat a skillet over medium-high heat and add the thinly sliced steak to the skillet. Season with smoked paprika, garlic powder, salt and pepper to taste.
- In the same skillet, add the onions and bell peppers and sauté until they are soft and caramelized and the steak is cooked, about 4-5 minutes. Remove from heat (I use a slotted spoon to drain the juices) and set aside. Pat the meat and veggies dry with a paper towel. This will prevent the quesadilla from becoming soggy.
Assemble the Quesadillas
- Spread a generous amount of Cheez Whiz sauce over each tortilla.
- Divide the cooked steak, sautéed onions, and bell peppers evenly among the tortillas.
- Top each with another tortilla to form a sandwich.
Cook the quesadillas:
- I use the same pan and pat it dry to remove the moisture from the meat and add 1 teaspoon of olive oil or butter to the skillet at medium-high heat. Add a quesadilla to the skillet. Cook in batches if necessary.
- Cook for 2-3 minutes on each side or until golden brown and crispy, and the cheese is melted.
- Repeat with the remaining quesadillas.
Notes
Nutrition
Nutrition Data
Macros are provided as a courtesy and should not be construed as a guarantee. This information is calculated using MyFitnessPal.com. To obtain the most accurate nutritional information in a given recipe, you should calculate the nutritional information with the actual ingredients used in your recipe, using your preferred nutrition calculator. You are solely responsible for ensuring that any nutritional information provided is accurate, complete, and useful.
Substitutions, Variations, and Add-Ins
- Chicken
- Shrimp
- Mushrooms
- Jalapenos
- Salsa
- Avocado
- Tomatoes
- Spinach
- Black Beans
- BBQ Sauce
- Green Onions
Frequently Asked Questions and Recipe Pro Tips
Be sure to drain the juices from the meat and veggies and pat them dry before adding them to the tortilla. If you don't, the juices will penetrate the tortilla and cause it to be soggy.
Wrap each quesadilla individually in plastic wrap or aluminum foil. Place them in an airtight container or resealable plastic bag and store them in the refrigerator. Properly stored, they can last for up to 3-4 days.
Yes. Ribeye is the classic choice because it’s tender and flavorful, but you can also use sirloin, flank steak, or even shaved steak from the grocery store. Just slice it thin so it cooks quickly and stays tender.
You don’t have to, but it helps. Placing the steak in the freezer for about 20–30 minutes firms it up, which makes it much easier to slice into thin strips like a traditional Philly cheesesteak.
Absolutely. If you already have cooked steak in the fridge, slice it thin and warm it with the peppers and onions before adding it to the quesadillas.
The classic combo is sautéed onions and bell peppers. Some people also like to add mushrooms. Keep everything sliced thin so it cooks quickly and fits nicely inside the tortilla.
Cook them in a skillet over medium heat with a little butter or oil. Let them cook undisturbed until the tortilla gets golden and crisp before flipping.
I am super particular about my steak. I don't like it dry so I wouldn't recommend air frying cooked steak along with the peppers, cheese, and tortillas. You will risk drying out the meat.
If you want to air fry the steak (it's one of my favorite ways to cook it!) Air fry the steak at 370 degrees for 5 minutes. After 5 minutes, open the air fryer and examine your steak. Cook time will vary depending on your desired doneness. Use a meat thermometer and cook to 125° F for rare, 135° F for medium-rare, 145° F for medium, 155° F for medium-well, and 160° F for well done.
From here you can sear the steak in a pan with the remaining ingredients. If you want to air fry the tortilla along with the cooked steak and other ingredients you can do so at 350 degrees until the quesadilla is crisp. Again, this isn't my preferred method because the steak wasn't as juicy.
Oven or Air Fryer: Heat at 350 degrees until heated through.
Skillet: Heat a skillet over medium heat. Add oil if not using a non-stick pan. Place the quesadillas in the skillet and cook for a few minutes on each side until they're crispy and heated through.
Microwave: For a quick option, you can microwave the unwrapped quesadillas on a microwave-safe plate for 1-2 minutes, or until hot. This will soften them and the quesadilla will not be crisp.
Place the quesadillas in a freezer-safe container or resealable bag. They can be stored in the freezer for up to 2-3 months. Defrost in the fridge overnight.
Dipping Sauces to Pair with Quesadillas
Burger Sauce Recipe
Queso Cheese Dip
Ranch Dressing
Honey Mustard
Buffalo Sauce
Pair With These Recipes
Chipotle Rice Recipe
Slow Cooker Crockpot Mexican Rice
Cajun Fries
Joanna says
So delicious! My husband loves a good Philly cheesesteak and I have not been able to successfully make one at home. The beef and cheese sauce are amazing! I'll admit, we just put the steak and cheese in hoagie rolls, but we will be making this again - as quesadillas or just as sandwiches.
staysnatched says
So glad to hear it!